
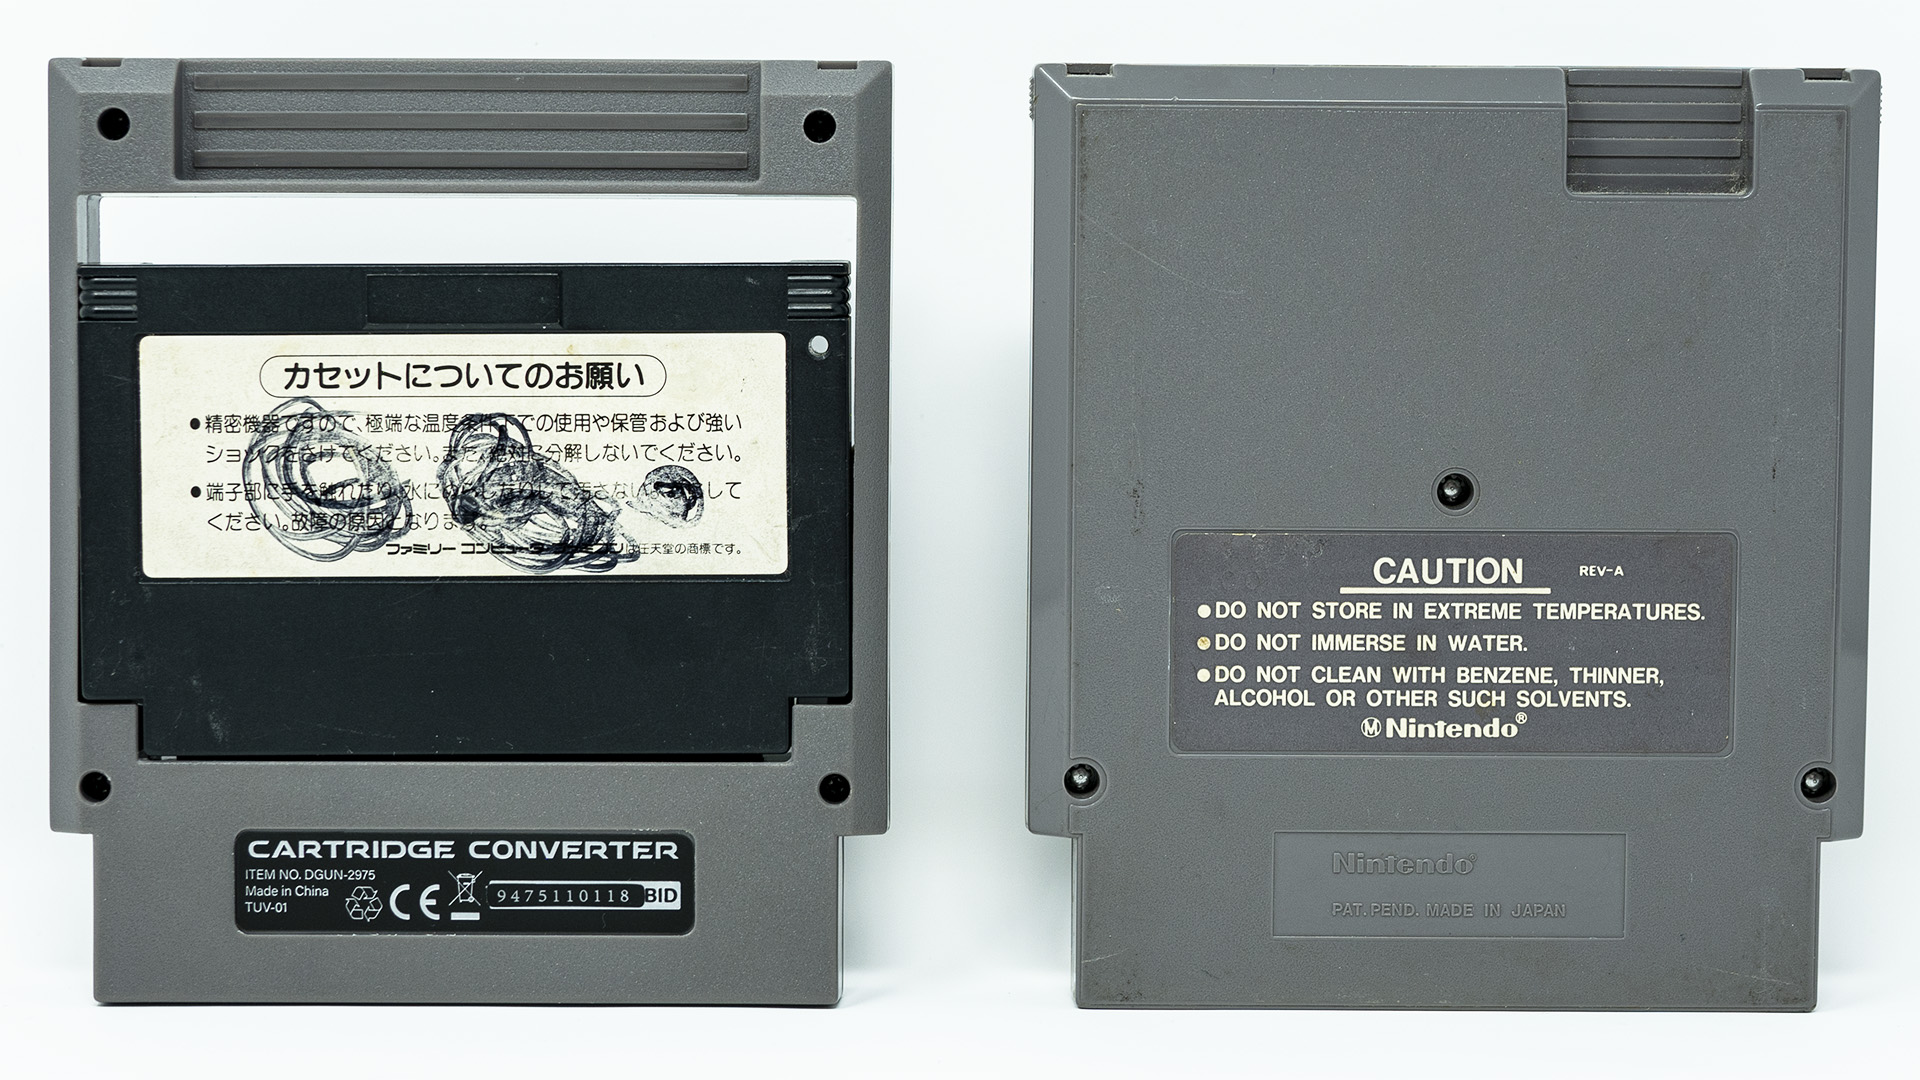
I recently saw a $15 cartridge converter on Amazon that allows you to play original Famicom games on an NES. The main difference between this one and previous I’ve tested is the shape and orientation: After connecting the cartridge, it takes on the shape of an NES cart, with the label facing the same way a NES cart would when inserted.
Overall, it seemed to work fine, but required modification if you planned on using games with Famicom expansion audio. Here’s a link to purchase and a full review is below:
My Arcade Famicom to NES Converter: https://amzn.to/3Yg6jAz
Size & Fit:
The My Arcade adapter is the same size and shape as an original NES cartridge, which (as far as I know) is the first time anyone’s created an adapter like this:
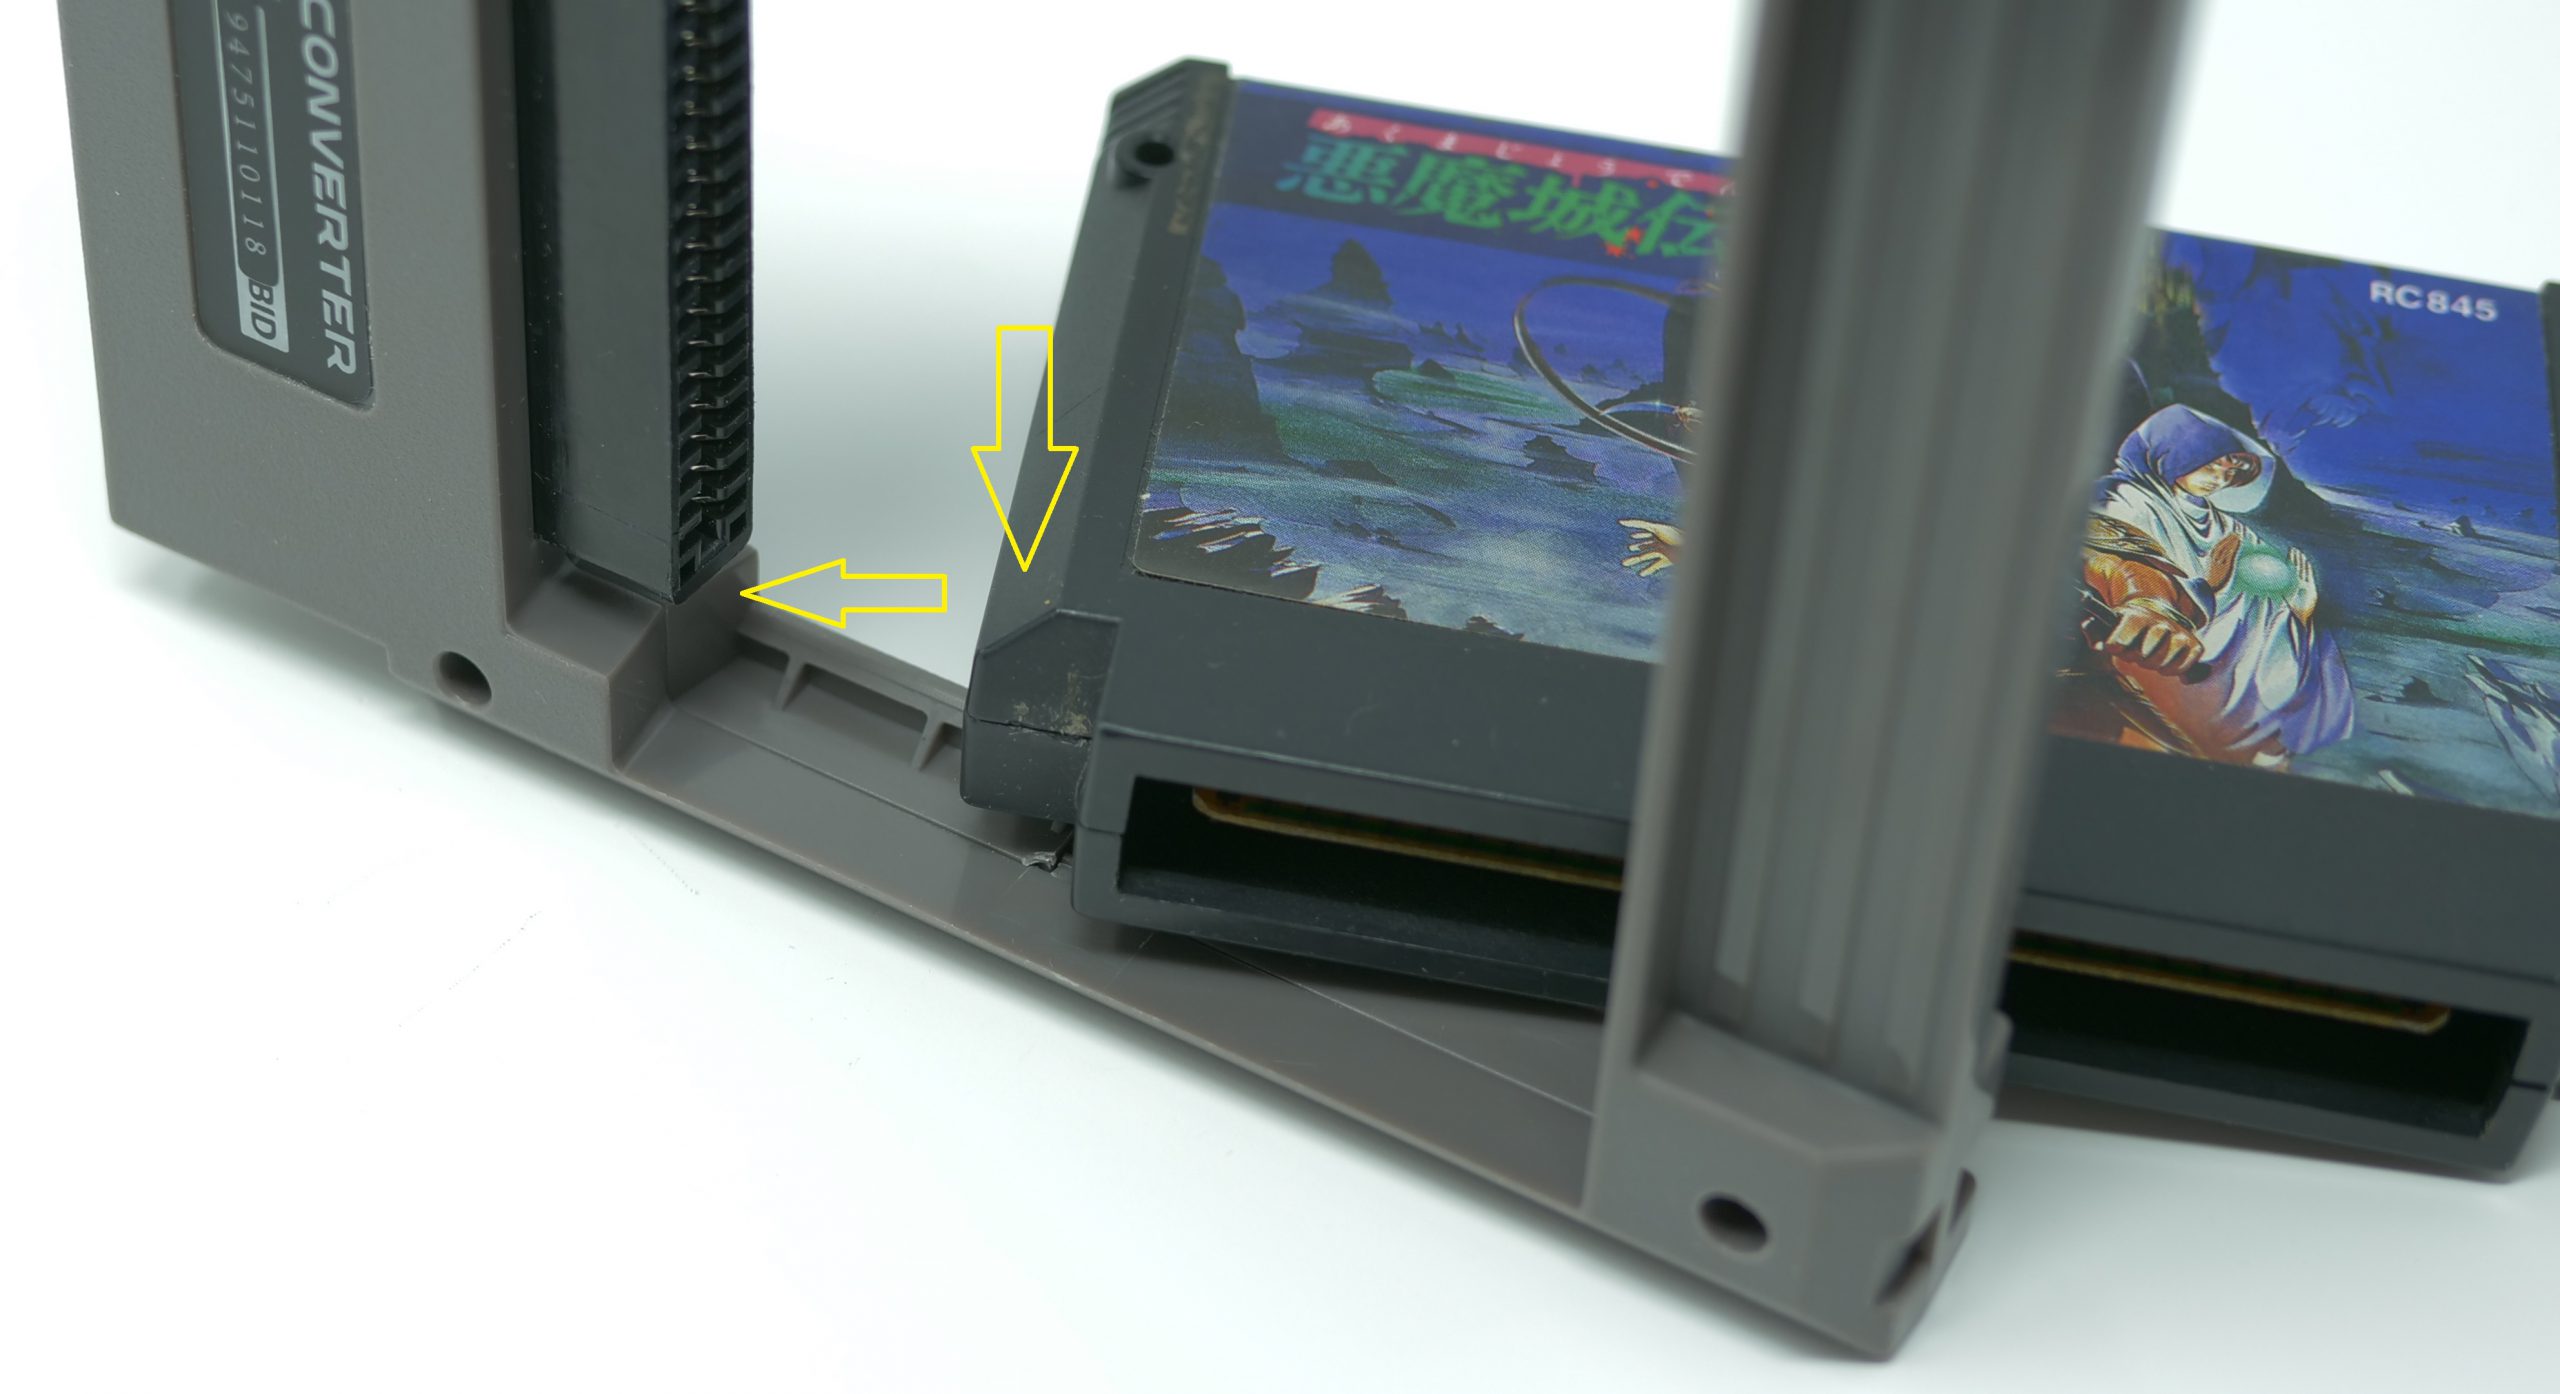
One handy feature is the plastic around the cartridge input is tapered. While a basic feature, this is often overlooked on other adapters and many have no indication of what side is “up” for the Famicom cartridge. With these tapered edges, there’s only one way to insert the cartridge:
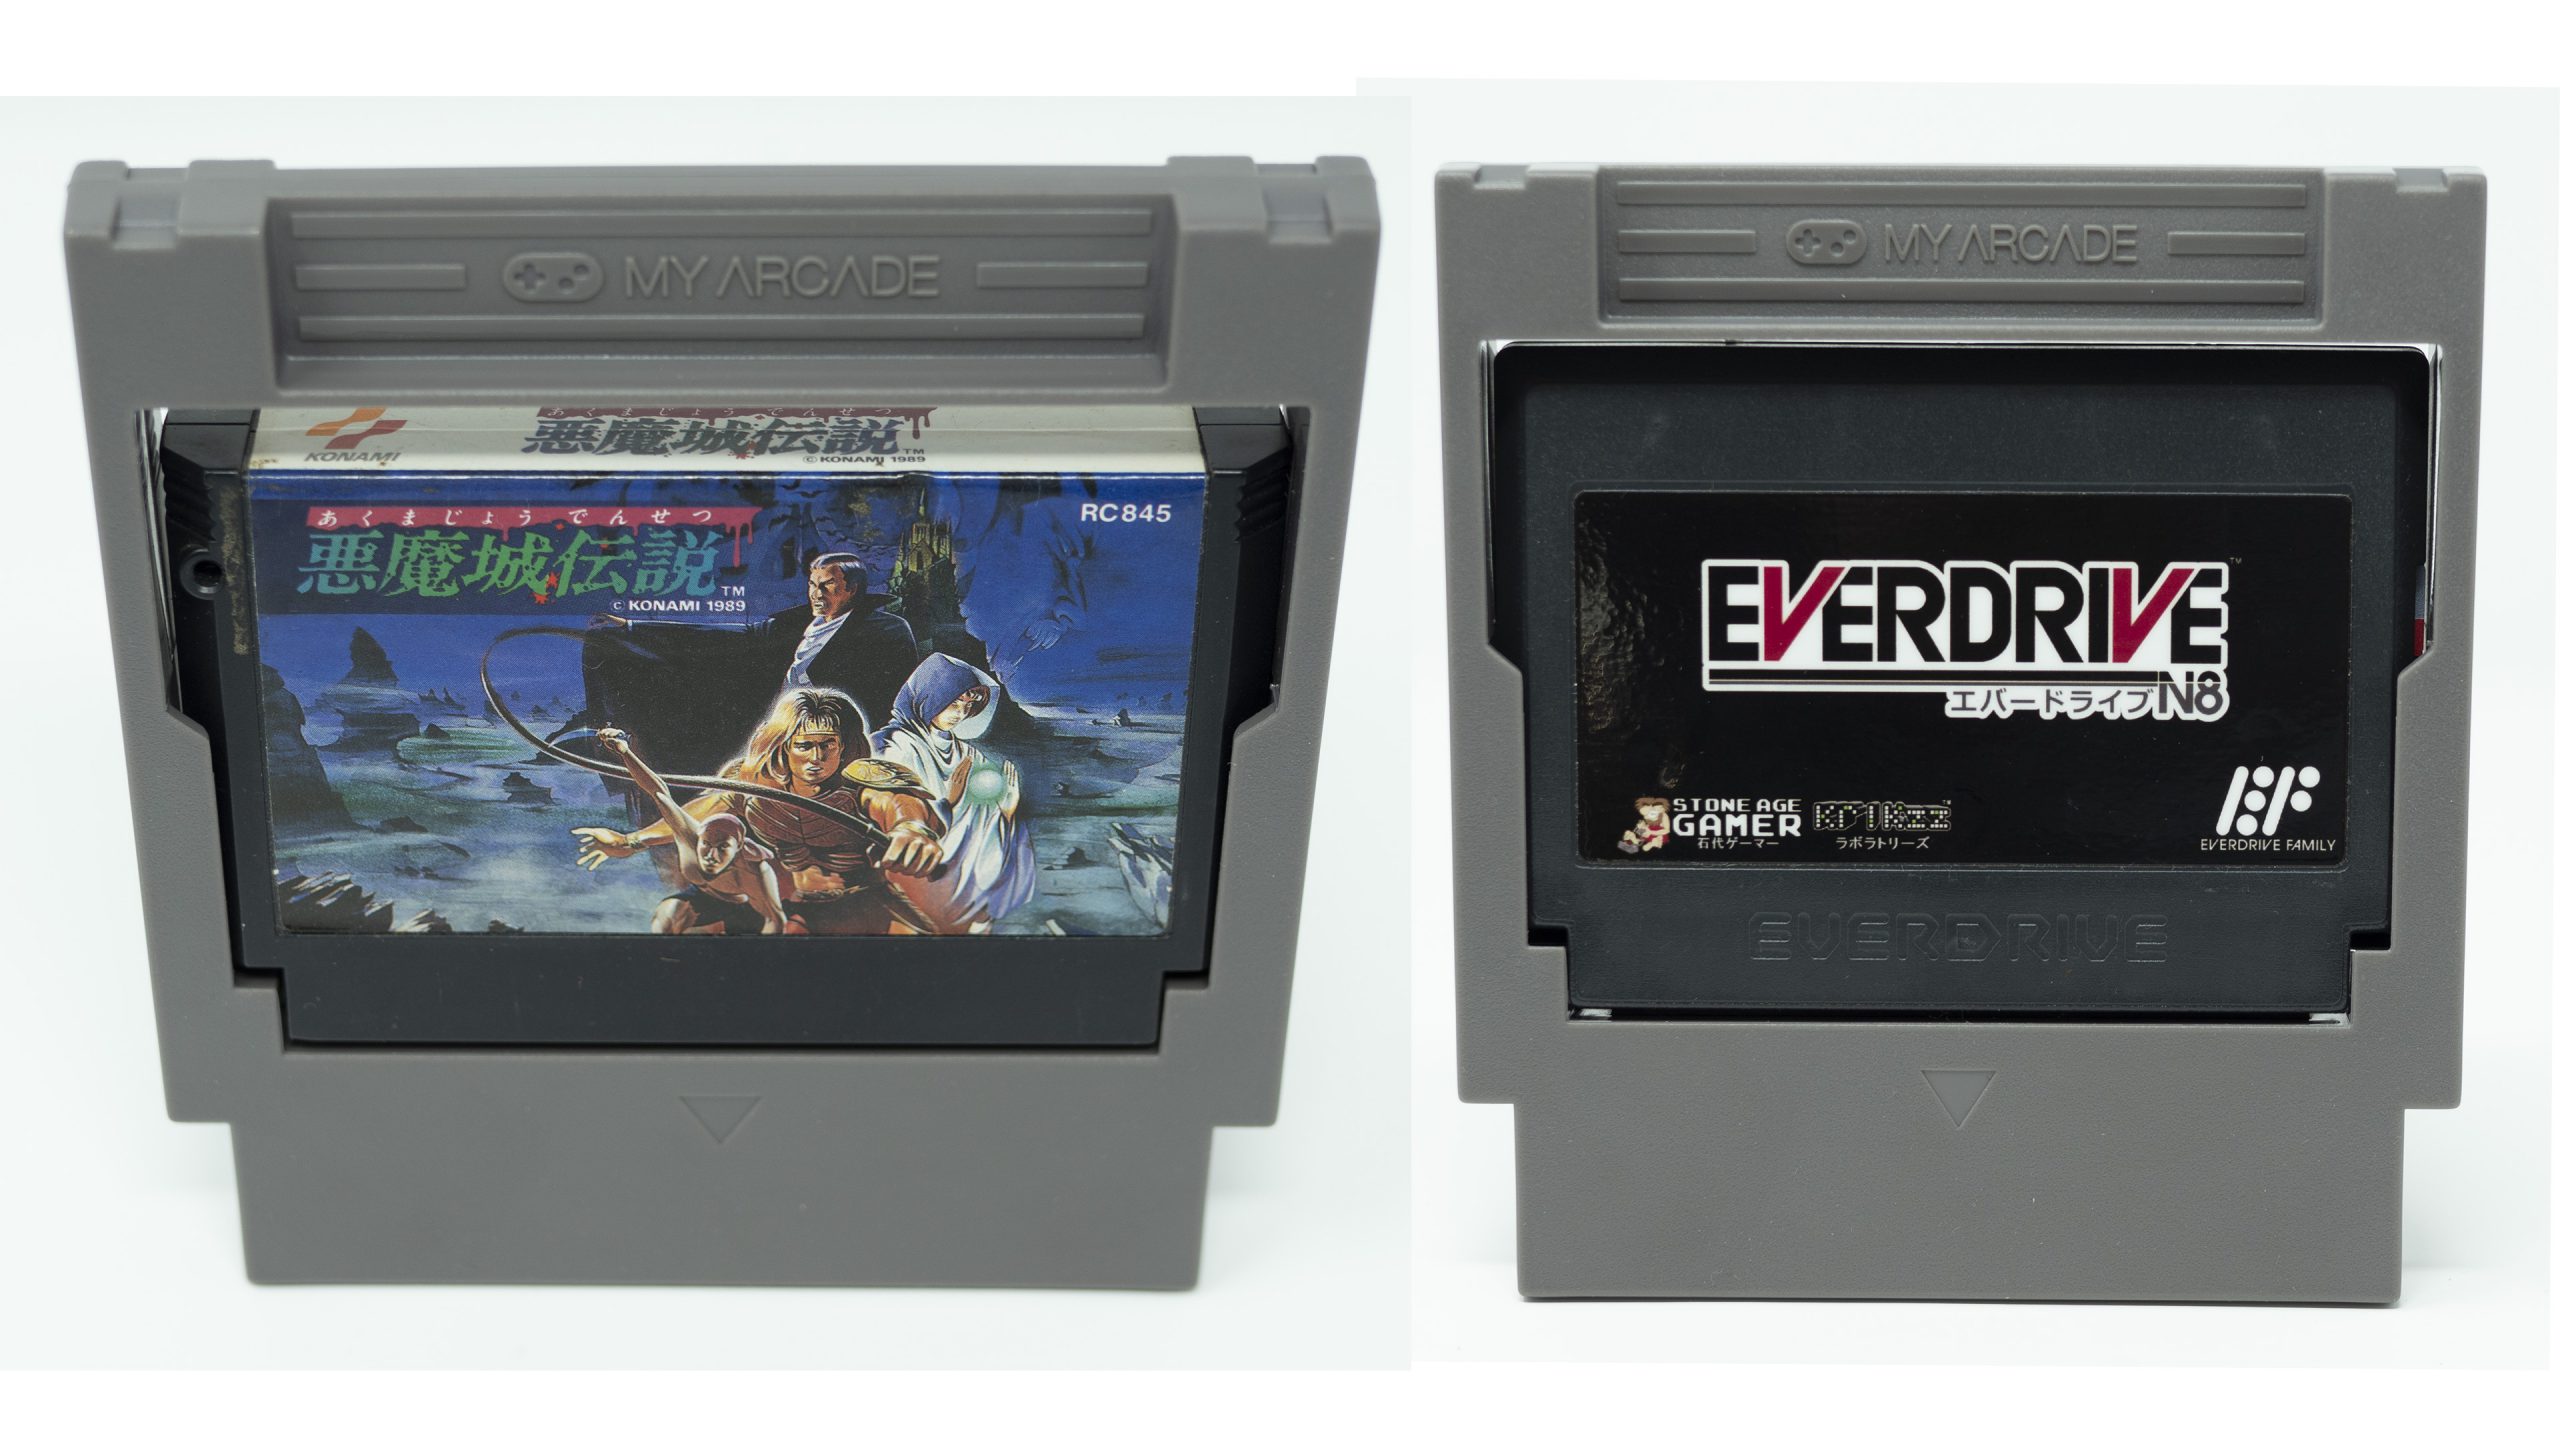
The adapter will fit standard Famicom cartridges, as well as the original Everdrive N8:
Unfortunately, larger cartridges such as Konami games like Madara or Esper’s Dream2, or the Everdrive N8 Pro will require one of the previous “ribbon” adapters, as they’re just too tall to fit into these:

It seems to fit fine in my front-loading NES and I was less nervous relying on a full piece of molded plastic to remove the cart, than I was a ribbon like with previous adapters. Also, with some games, I had to re-insert it a few times before the game booted, but that’s common for all NES games these days; Make sure your games and cartridge slots are clean before using it:

Famicom Expansion Audio
Many games for the original Famicom included extra audio channels provided by the cartridge (or FDS) that bizarrely aren’t available on the NES versions. In order for these extra audio channels to work on a NES, the audio needs to be routed first to the cartridge connector, then through the NES’ audio mixing circuit. The fact that the NES doesn’t have this single line connected makes no sense to me, as it would have cost nothing to add it to the design and it would have made porting Japanese versions of games easier, since they wouldn’t have to re-do any music tracks. I suggest researching the method recommended for connecting expansion audio to your model NES, but it’s usually a really simple mod.
On the cartridge side of things, the original games themselves don’t need modification, but almost every cartridge converter I’ve seen does and I can’t understand why – Adding the single trace to these converters would cost nothing and there’s no downside if you don’t end up using it. Unfortunately, once again, we need to do this modification ourselves, but like the internal mod, it’s really easy!
Let’s open this thing up and mod it ourselves!
The first thing I noticed after opening is how easily the plastic breaks!!! After removing the four Philips head screws, you still need to pop out the small plastic tabs on the side holding it in place. Even after carefully separating the pieces, the tabs broke right off.

It seems to go back together okay though, so it’s not a dealbreaker. If they’d have included the single trace for the Famicom audio, we’d have never needed to open this in the first place :/ I’d consider gluing mine, if I ever see more separation happen, but it seems fine for now:

As for the PCB itself, it seems to be decently built. I’d bet the contacts are ENIG are not hard gold, but for a $15 device, I wouldn’t expect them to use longer-lasting gold. The PCB itself does appear to have a beveled edge, which (in my opinion) is much more important than hard gold vs ENIG, as that affects your console’s cartridge port, not the adapter:


All that’s needed to enable expansion audio is to connect two pins (that’s the blurry wire in the picture above). The mod is different on each brand adapter and as you can see from the extra solder in the picture below, I started out with the wrong mod on this one…

For the My Arcade adapter (at least the version I tried), you need to connect pad 55 on the NES cartridge to the 16th pin from the left (15th from the right) on the Famicom slot; I wish I could just say “pin 45”, but My Arcade listed the pin numbers as 1-30 on both sides :/
Both points are located on the same side of the board as the chip, so you don’t need to worry about wrapping a wire around. Also, my goal was to get the wire as high on the pad as possible, with the smallest amount of wire and solder touching the pad. Well, as you can see, I allowed too much solder to transfer across the pad. Then, when trying to clean it off, I got some solder on the adjacent pad. Electrically it’s fine and the pins aren’t shorted, however I would have liked a nicer-looking picture for this post.
Before reassembling, you’ll need to cut a tiny bit of plastic on the cartridge port of the adapter, in order to fit the wire through. If you don’t, the plastic will crush the wire and bulge out a bit, so definitely remember to do this.

I didn’t bother trying to make this “pretty”, as it’s a cut no one will ever see:

And that’s pretty much it, just bolt it back together and start using it. The only other tip when re-assembling, is board orientation – If you forgot which way the board goes in, place it into the front shell with the chip facing up:

So, overall, this is a decent adapter. If My Arcade were to simply add that one trace to the board, I’d call it a “must have” for any NES fan that wants to play Famicom games. Also, it would be nice if they numbered the Famicom slot properly, for any other mods people might want to do.
Who knows, maybe we’ll see a “rev 2” version of this some day?
Auto Amazon Links: No products found. http_request_failed: A valid URL was not provided. URL: https://ws-na.amazon-adsystem.com/widgets/q?SearchIndex=All&multipageStart=0&multipageCount=20&Operation=GetResults&Keywords=B07NHHSLG8&InstanceId=0&TemplateId=MobileSearchResults&ServiceVersion=20070822&MarketPlace=US Cache: AAL_366b8e6f4e0cd708e0c120c19cbd7901
