SNES 1CHIP Console
This page has information on Super Nintendo consoles that have the “SNS-CPU-1CHIP” motherboards, which are known for their higher quality video output.
In 1995, Nintendo released a revision to their Super Nintendo consoles that combined the system’s two video chips into one. They appropriately labeled these motherboard revisions “1CHIP”. While all of the 1CHIP revisions output RGB without a modification (only the correct RGB SCART cable is needed), there are a few things you can do to enhance the performance of the console. You’ll have to start by finding a SNES with the correct motherboard though:
Finding the 1CHIP SNES:
I have a page dedicated to this, with as much information as I could find: http://www.retrorgb.com/1chipsnes.html
Brightness / Signal correction:
All 1CHIP consoles output a signal that’s too bright. This can result in an image that’s slightly washed out, or shows signs of “ringing”. In fact, it’s possible that this is a big part of the reason some people think SNES Mini’s look better then 1CHIP’s. Luckily, the fix is extremely easy!
– Disassemble the 1CHIP console and flip the board over.
– Locate the “R6”, “R7” and “R8” RGB via holes
– Solder three 750 Ohm resistors to the holes and then solder all of them to the ground point shown in the picture. FLUX WILL MAKE THIS MUCH EASIER!!!
– Make SURE to trim any of the resistors that are sticking out the other end.
– That’s it – Click the picture for a full-sized view:
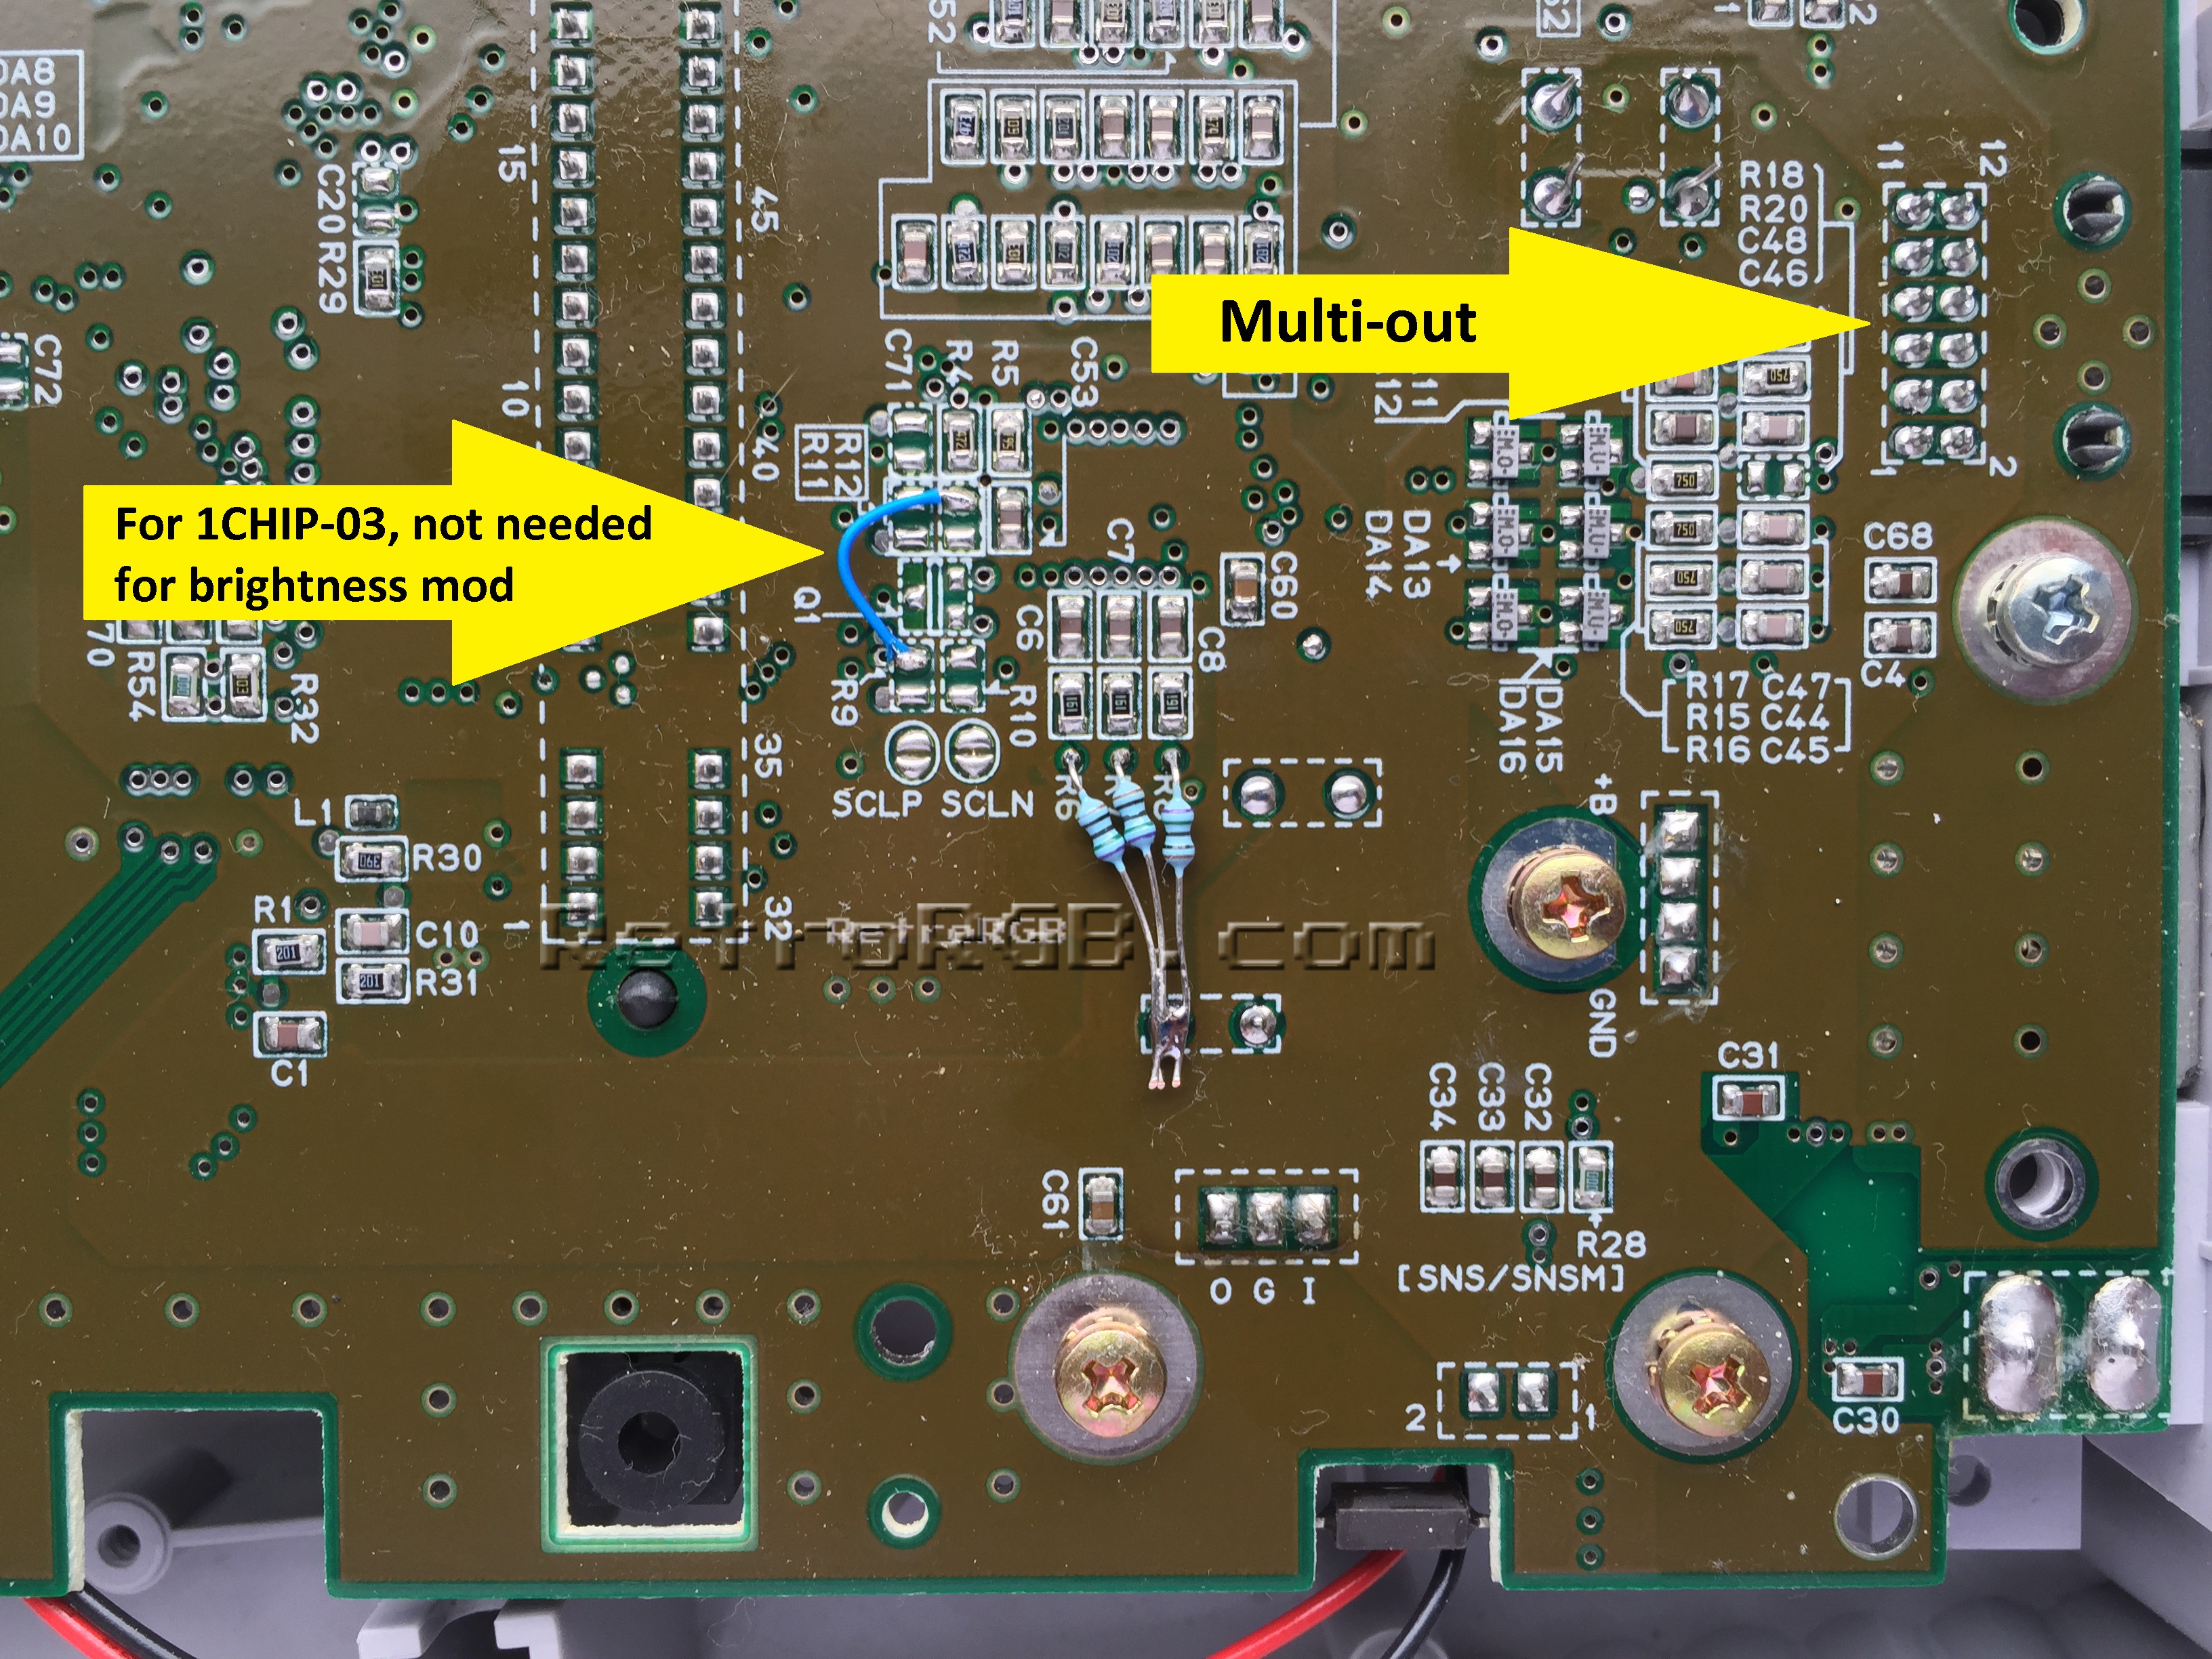
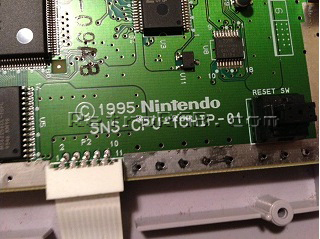
There are three revisions of the 1CHIP motherboard: SNS-CPU-1CHIP-01, SNS-CPU-1CHIP-02 and SNS-CPU-1CHIP-03. The “03” revision does not have csync run to the multi-out. You can use these consoles without a modification, simply by using an RGB SCART cable that gets sync from luma. I’ve been able to restore csync on these consoles by using a simple jumper wire, however that doesn’t seem to be the best solution, as it’s missing circuitry found in the other 1CHIP revisions: http://www.retrorgb.com/snescsync.html#1chip-03
If you have a 1CHIP-03, you’ll want to consider using a sync-on-luma cable, restoring the entire circuit on the motherboard, or using an RGB bypass board that includes the full csync circuit.
1CHIP RGB Bypass:
Even though the 1CHIP consoles already output high quality RGB, you still might want to bypass the onboard amp and use a different one. There are a few reasons people may want to do this, but most 1CHIP users wouldn’t need to:
Pre-assembled THS7374 amps: There are newer pre-assembled bypass boards that include the high-quality THS7374 chip, as well as a full circuit for csync. These would work with all 1CHIP revisions, but are recommended for the 1CHIP-03, since it also includes the csync circuitry
The THS7314 amp is commonly used in many modding projects, as it’s cheap and easy to assemble. It’s a good quality amp and learning how to make your own might be fun for any DIY’ers. Click here for a guide on how to install one in a 1CHIP SNES.
People have integrated the THS7314 into their own pre-made board. This guide specifically shows how to install Borti’s board, however the basic instructions will be the same for pretty much anything similar.
Digital Audio Mod:
If you’d like to add high-quality audio to your 1CHIP console, you can install a SPDIF board. Tons of information, installation guides and links to purchase are on this page: http://www.retrorgb.com/snes1chipdigitalaudio.html
Other Tips / Mods / Vertical Line
There are other mods that can be done to all revision SNES consoles, including the 1CHIP’s. More information can be found here:
http://www.retrorgb.com/snestips.html
http://www.retrorgb.com/snesverticalline.html
Feel free to go back to the main SNES page. If you’d like info on mods for other systems, head to the Getting RGB From Each System page or check out the main page for more retro-awesomeness.