In most cases, the game resolution you’ve captured will be smaller than the target resolution you’re aiming for. I prefer to use VirtualDub to scale the captures any way I’d like, which not only allows for clean integer upscaling, but can also be used for adjusting the aspect ratio to mimic the exact proportions of a CRT.
Required Software:
This method uses completely free software. Please download and install the following:
I didn’t seem to need anything else other than the main software. It seems that the codecs needed are already built into the software and I didn’t have an issue playing the FFV1 files in Premiere,
VLC, or
MPC.
Alternative Methods (might be necessary if you use scripts, otherwise stick to the above):
Upscaling with VirtualDub
Start by opening VirtualDub and opening the file. I’ll use a capture of a Sega Genesis game with a 320×256 resolution as an example here.
In the menu bar, go to Video\Compression and choose what you’d like. I prefer FFV1 uncompressed, but you can select other options if you have a preference.
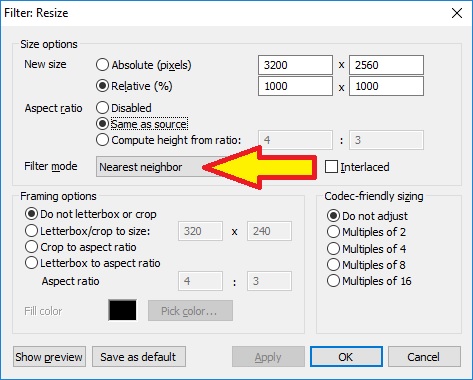
Then go to Video\Filters, hit “Add” and choose “Resize”. Make SURE you select “Nearest neighbor”, since that is what ensures pixel uniformity when using integer upscaling ratios . For this example, I’m targeting a 4K output resolution and want the “overscan” look, so I’ll choose 10x (9x or 11x may be better for some consoles):
This will give you a pixel-perfect 4K scale, that is larger then the vertical height of 4K, requiring cropping. If you’re capturing directly, continue to “Aspect Ratio”. If you’re capturing using standard 480p, 720p or 1080p resolutions, please skip to Cropping below.
Aspect Ratio Correction
If you’re using a direct-capture, the aspect ratio will not match would would normally be shown on a CRT. Please remember that classic game consoles designed in the CRT era didn’t use “pixels”, they used “samples per line”. If you need a reminder, this is explained well in this video:
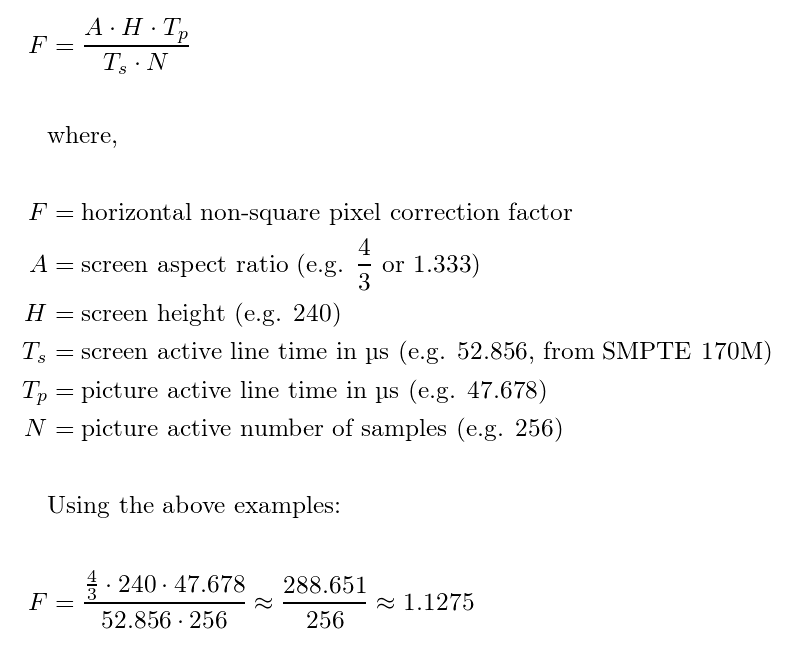
https://youtu.be/LHfPA4n0TRoIn the context of this scaling exercise, the common horizontal resolution of 320 would be slightly too wide to just scale cleanly. Also, another common retro game horizontal resolution of 256 would be too narrow. Ste from HD Retrovision derived a generalized formula, which can be used with various console measurements to calculate the proper correction ratio for any type of input:
Lucky for us, most of these parameters don’t change between different consoles, so he was able to significantly reduce this into a much easier to follow reference:
– For 320 sources, scale by 90.2% horizontally (288.651/320).
– For 256 sources, scale by 112.75% horizontally (288.651/256).
THERE’S A PROBLEM THOUGH
If you’re scaling still images, you can just use Nearest Neighbor to stretch or shrink the image. While yes, 90.2 and 112.5 aren’t “integer numbers”, it’ll look great…for STILL IMAGES ONLY. If there’s any movement on-screen, this will add a shimmer that’s not a good representation of the image.
You
could try using another scaling algorithm like Lanczos3, however that will blur 2D graphics and completely defeat the purpose of all this work. As a result, if your goal is video signal analysis, I’d recommend (gasp!) leaving the IMPROPER aspect ratio and keeping the pixels square. If you’re showing closeup shots, or cropping for side-by-side comparison, it’s not
too noticeable. You might even leave a note explaining they’re square pixels for analysis reasons…but even with a note, improper AR is a bad representation of what the game looks like. If you need the best quality, with the sharpest pixels, you might need to upgrade all the way to
a RetroTINK 4K, or use different software for AR correction. I’ll update this page if I ever find a good solution.
If your graphics are 3D, you might get the desired effect by AR correcting here. If you’d like to give it a try for 2D graphics, that’s cool too…and please let me know if you find a VDub plugin that can allow for a bilinear sharp stretch. Here’s how that would be done (and once again, this will look BAD as shown here for 2D sharp graphics):
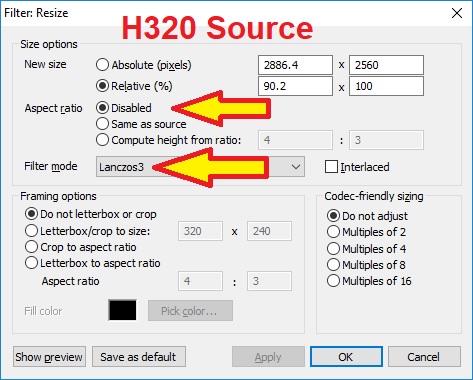
Go back to Video\Filters, hit “Add” and choose “Resize” again to add a second scaling process that happens after the first. Select whichever you’d like – I’ll just use “Lanczos3” here in the example – then disable aspect ratio lock and set the horizontal scale to the recommended setting. Remember this is a 320 source, so we’ll be setting it to 90.2%, leaving the vertical scale at 100%. This setting will be the same regardless of what the target resolution is, as you’ve already integer-scaled to 720p, 1080p, 4K, etc in the previous “filter” step:
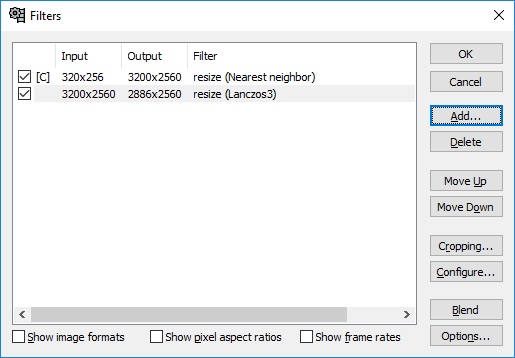
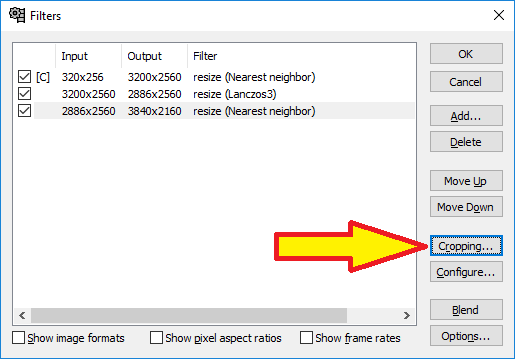
Now your filters should look like this:
For more information on the exact percentages to resize for each retro gaming resolution, please check out FBX’s video on the subject:
https://youtu.be/2owtAwcysQICropping / Fitting to Standard Resolutions
Now you’ll need to decide how you’d like the file presented. If you’ll be importing this file into video editing software such as Adobe Premiere, you can just export the file as-is: A 3200×2560 file. I think in most situations, you’d want to output the file to fit a standard resolution. Just a few more steps are necessary for that.
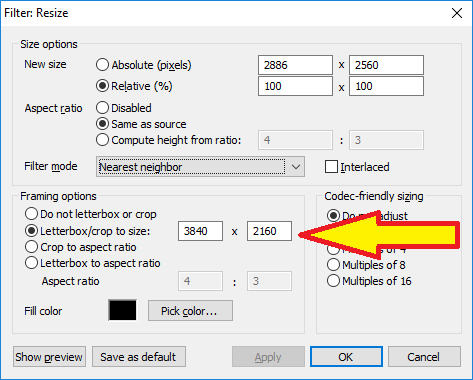
Add another resize filter like the last two and this time, add a letterbox to the target resolution. This will add color bars on the sides, to fill the target resolution. The default color is black, so that’s usually the only setting I change:
I now recommend cropping the image. If your target resolution is smaller than the current scale (5x for 1080p, 10x for 4K), then you’ll need to crop the areas of the screen you don’t want to fit within the standard vertical resolution. Also, even if your target scale is within the resolution, you may still want to crop out any noise or unwanted parts of the video. To do this, highlight the “cropping” resize filter you just added at the bottom, then hit the “Cropping” button in the filters window:
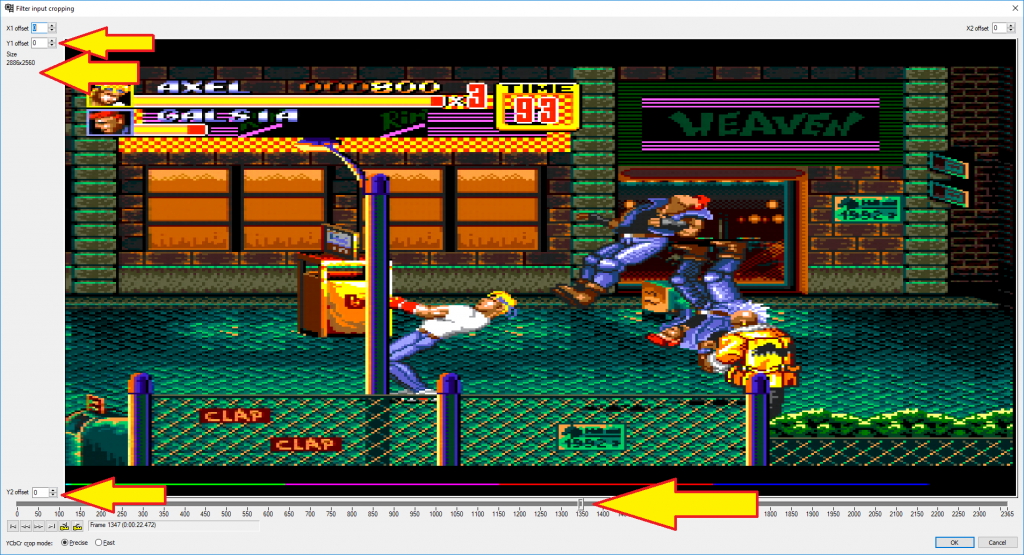
I suggest scrolling to the main part of the video (bottom arrow) to get an idea of what’s on the screen. Keep in mind, that this window’s aspect ratio might be off, depending on your display; This is normal and won’t affect the output file (VDub2 looks slightly different, but is the same procedure):
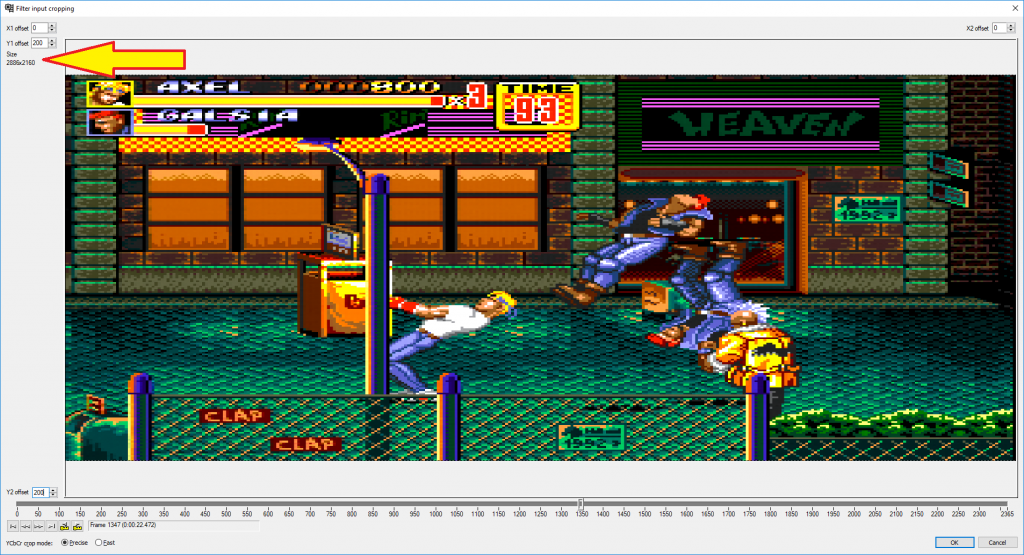
For 5x or 10x scales, you’ll want to keep cropping unit it reaches the target vertical resolution. For other scales, just crop out whatever areas you don’t want and don’t worry about the resolution, as the letterboxing we added in the previous step will add black bars around the remaining image.
Then just hit “OK” and “OK” once again in the filters menu. Then go to “File\Save video” (or “File\Save as AVI” if you’re using the older VDub) and save the file. As a warning, the file will be very large.
YouTube Compression
YouTube and other online video services with compress your video to death. Scanline filters will never look right, random noise will appear all over that wasn’t present on the original file and aspect ratios will get stretched across mobile devices. There’s not much you can do about it, but pre-compressing the file with handbrake will help reduce some of the stress. You can technically compress in the steps above via VirtualDub, however I’ve run into weird issues where certain resolutions won’t process if compression is turned on. You can try if you’d like, but I get much better results saving via uncompressed file formats, then using handbrake to compress that file via h264 or h265.
The presets are okay, but the only weirdness I run into is with dimensions. For some reason, Handbrake often wants to crop videos I import. If this happens to you:
– Uncheck “Keep Aspect Ratio”
– Set the resolution to what ever the file was
– Set “Cropping” to “Custom”
– Set all four crop positions to 0
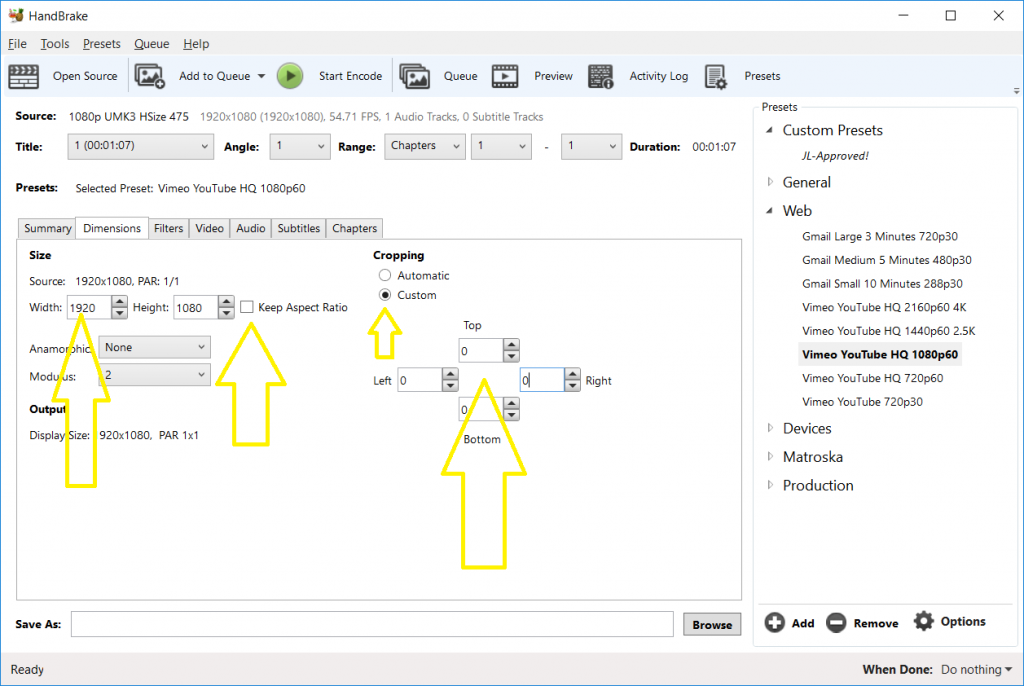
Other than that, Handbrake is pretty easy to use and does a great job. Compressing big files takes a long time though…