It’s often you’ll find SD (or MicroSD) based devices that list compatibility as “up to 32GB”. I found that in every single case I’ve tested, the limitation is the card’s formatting and NOT size. I’ll post a technical description at the end, but all you really need to do is format the card a specific way and depending on your operating system, it may require some (free) programs:
Windows:
Format your SD card once with “SDFormatter” to clear any extra partitions that may have been added with something like a Raspberry Pi image:
Insert your SD or MicroSD card into your computer and load the SDFormatter software.
Select the drive your SD card is in from the drop-down menu. Be very careful with this step, as if you choose the wrong letter, you can accidentally erase any other drive that’s plugged in!
Make sure to hit the “option” button and set “FORMAT SIZE ADJUSTMENT” to “ON”.

I’ve found that it’s common the format will fail on the first try. No problem at all, just clear whatever garbage might appear in the “Volume Label” box and try again. It almost always works on the second try.
Format again with FAT32 Format and not the built-in Windows tool:
Download the GUI version of fat32format: http://ridgecrop.co.uk/index.htm?guiformat.htm
Select the drive your SD card is in from the drop-down menu. As before, be very careful with this step, as if you choose the wrong letter, you can accidentally erase any other drive that’s plugged in!
Check off the box labeled “Quick Format”.
Please note that this program will require you to close all Windows Explorer boxes before formatting. If you accidentally leave one open, it’ll give you a “drive in use” error – No big deal, just close all boxes and try again.
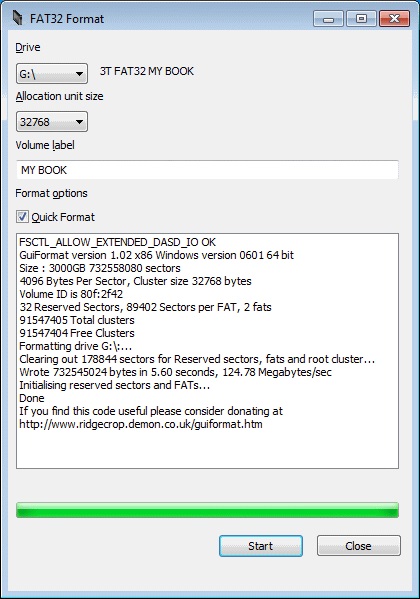
That’s it! Just hit Start and your SD card will now be formatted FAT32!
Once again, this has worked in every scenario I’ve tested. At the time of writing this, I can confirm the SD2SNES (original and Pro), EverDrive64, Mega SD and SSDS3 are all compatible with 64GB cards and higher (I use a 256GB with the Mega SD). I’ve also seen this work on cellphone’s, camera’s and other devices that advertised FAT32 as a limit.
I believe the reason for all this comes down to cost: Supporting FAT and FAT32 filesystems is free, however if a company wants to include support for NTFS or exFAT (both filesystems that support cards of all sizes) they’ll need to pay a licensing fee. Also, I believe the reason Microsoft doesn’t include a built-in option to format large cards FAT32 is due to the file size limitation: The maximum size any one file can be when using FAT32 is 4GB, where the max file size on newer filesystems is 16 ExaBytes. I imagine the Microsoft limitation is also to try and force people to pay licensing costs for the newer filesystems…something Microsoft has a history of doing ;/
Mac / OSX
Mac users should have it much easier! Start by opening the Disk Utility and selecting the SD card:

Then hit the “Erase” button up top and select “MS DOS (FAT)” from the drop-down menu:

Hit Okay and that should be it!:
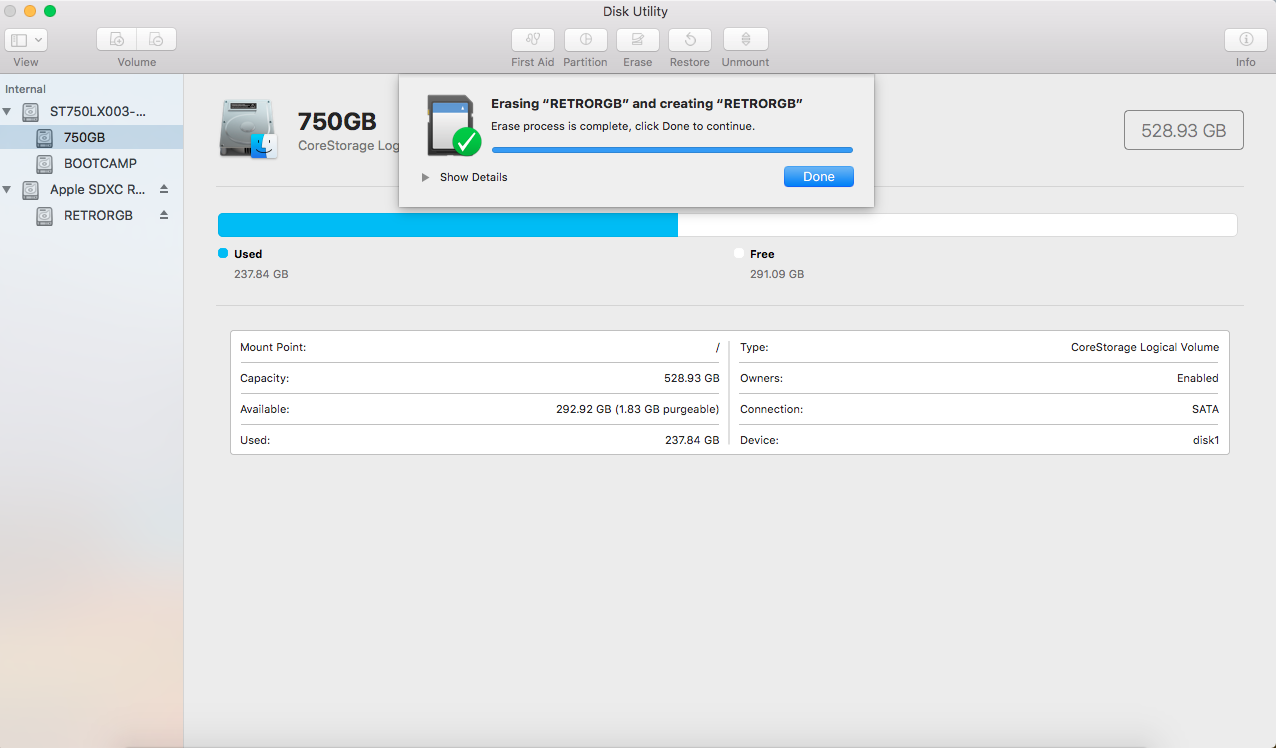
Now, I’m far from a Mac expert, but these screenshots were provided by Ray Commend, who tested and verified on his Macbook. If I’m remembering correctly, this should be the same on all versions of OSX, but please let us know if it needs to be updated.
Linux:
I haven’t had time to dig out my Linux laptop, but I imagine this is also possible…with a nonsensical, 762 character command prompt entry that needs to be manually typed each time you do it. Cause don’t forgot Linux’ official slogan: Linux: We don’t want new users.
At the moment, from a gamers point-of-view, the FAT32 file size (and filesystem) limitation will only be relevant starting with the PS2/Xbox era (although a large part of their libraries are under this limit); Basically, the limits only start to affect DVD-sized files or larger, so any device that requires large files will pretty much be forced to implement exFAT.