Cleaning Cartridge Games and Cartridge Input Slots
Since this website is dedicated to getting the best quality out of your systems, an important thing to worry about is keeping those systems running!!! This page is a great way to clean cartridge-based video games, as well as the cartridge inputs of the game systems themselves.
For the record, at no point does this guide say “blow in your game” 🙂 Also, I’m not responsible if someone reads this guide wrong and damages their game. Follow this at your own risk.
To start, you’ll need a few things:
– Q-Tips will work, but Tape Head Cleaners are better
– Standard, off-the-shelf, rubbing alcohol (although ‘professional’ isopropyl is better)
– A pink eraser
– Compressed air
– Tools to open your game cartridges – See the tools section.
– You’ll occasionally find games that have security-torx screws (my copy of Virtua Racing had these). I was easily able to open mine using a small flathead.
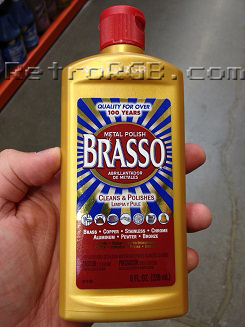
– Never, ever, EVER use metal polish on your games!!!
If you’d like to skip to Cleaning Cartridge Input Slots, click here!
Cleaning Cartridge Games
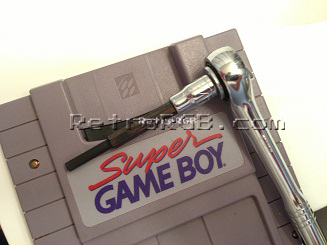
– First, start by using the special game tool to open the game. I’m using a Super Game Boy, so I can demonstrate cleaning cartridge slots, as well as games.

– If using a game bit, you may find that some game’s screws are too tight to open by hand. If that’s the case, a small ¼ inch socket with ratchet will help. Just make sure to only use the socket to help you unscrew the cartridge and do not use it to tighten them back up when you are done. It’s way too easy to overtighten and crack your game using a socket!
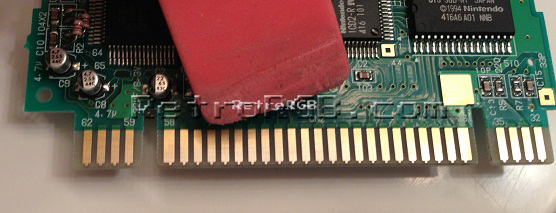
– Once the game case is open, carefully remove the guts. Here’s how a typical game looks, although you’ll often find them much worse:

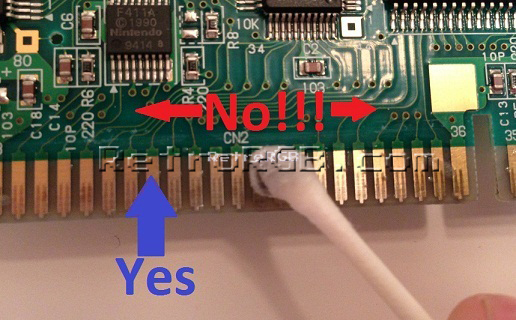
– Put a few drops of rubbing alcohol onto the Q-Tip and start scrubbing the copper contacts.

– Try your best not to get any on the green area above (and especially not on the components), only the copper. Also, after cleaning with alcohol, DO NOT touch the contacts with your fingers. The oils from your fingers can leave a residue that will dirty the games again. I’ll say it again: ONCE YOU’VE DONE THE ALCOHOL STEP, DO NOT TOUCH THE CONTACTS WITH YOUR FINGERS!!!
– After both sides are as clean as possible, use a new, dry Q-Tip to wipe off as much excess residue as possible.
– If the contacts still aren’t clean, grab your eraser and “erase” the copper contact pins, as well as the area at the bottom (the actual tip of the cartridge that enters the game system). Do this for as long as necessary until the contacts are clean. For the record, this is perfectly safe…I’ve actually used this trick in the past when I worked at a computer manufacturing company to clean dirty RAM contacts and it worked every time! That being said, I recommend an eraser that isn’t attached to a pencil, since you could scratch the contacts with the metal bracket of a pencil’s eraser.
– If you used an eraser, it’s good to repeat the alcohol step again (clean & dry), just to remove any eraser particles left on the contacts. Once again, DO NOT TOUCH THE CONTACTS WITH YOUR FINGERS AFTER CLEANING WITH ALCOHOL!!!
Cleaning Cartridge Input Slots:
If you’d like to clean the console’s cartridge input, the instructions are similar, except for a few differences. Here’s a rundown of what to do:
– First (obviously), make sure the console is unplugged. Even if it’s off, there’s still a small current passing through it and any time liquid meets current, something bad happens.
– Next, it’s always best to take the cover off of the game console, as it will make getting to the cartridge slot much easier. For most systems, this just requires a few screws and not much effort at all. Maybe take this opportunity to clean the console itself, if it’s dirty?
– Look inside the cartridge slot and see if anything’s stuck in there. If you see anything, just use a needle or dental pick to carefully scrape it out.
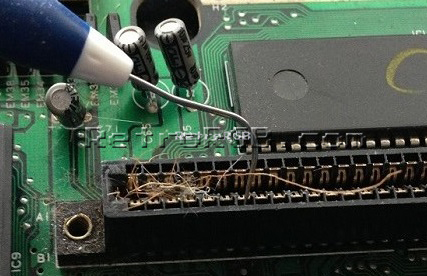
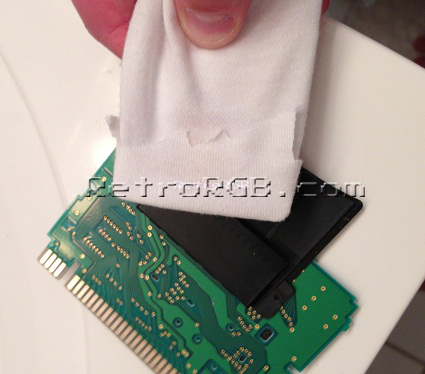
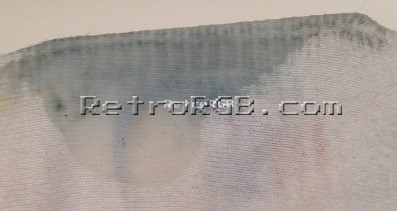
– Apply a few drops of rubbing alcohol to either a terry cloth or an old t-shirt and wrap it around a credit card. You’ll want a “snug” fit: Not lose, but make sure you’re not putting so much pressure on the pins that you’ll break anything. Depending on the console, you may need one to three layers of t-shirt. Also, you may need to repeat this step multiple times with a few different pieces of cloth. Keep doing it until the cloth comes out mostly clean.
– After cleaning with alcohol, spray a little compressed air into the cartridge slot to remove any excess gunk. You’ll probably find the cartridge ports to be even dirtier than the games!:
– You’ll most likely have to skip using an eraser (like with game cartridges), as it would be hard to find (or cut) one that fits properly. Worse case scenario, you can try finding a replacement cartridge slot for your console.
Overall, cleaning the cartridge slots is trickier then cleaning games, but worth doing once, just to make sure you don’t dirty any of the games you just cleaned.
Unfixable games / cartridge slots (extreme situations ONLY):
In the most extreme scenarios, you can try using a fiberglass pen to remove any rust or damage to the cartridge pins. Be extremely careful, as this will remove both the rust, as well as a layer of the metal itself! Then, make sure to clean once more with an eraser and alcohol.
Re-Cleaning at a later time:
If after cleaning your games using this method, your games end up getting dusty or dirty again, simply using rubbing alcohol and a Q-Tip should be more than enough to get them clean. Seriously though, if you clean them good now and keep them in dust covers, there’s an excellent chance you’ll never need to clean them again.
Conclusion:
I used these methods to clean my entire game collection, both systems and games. I made sure to clean them all on the same day, so that I wouldn’t dirty a newly cleaned game system with a cartridge I hadn’t cleaned yet. Literally every game cartridge and game system got the above treatment and everything works so much better now: I don’t have to reseat a game a bunch of times before it starts and as I said before, I had a few games that literally wouldn’t work; Now they work like new.
After you’re done cleaning the cartridge input, why not try cleaning the whole console and controllers?