Last year, I got one of Retro Game Restore‘s awesome clear shells for my PC Engine console. The kit also contained a new shell for my controller, which presented a conundrum; My console shell was in bad condition and I was happy to swap it with a replacement, but my controller was still in great shape and I wanted to leave it original. I’ve been debating how I’d use it, until yesterday when I saw Hyperkin’s controller, hanging on a wall at Brooklyn Games & Arcade. While I don’t like their look and feel, it comes with an adapter that lets it run on both PC Engine and Turbo Grafx-16 controller ports, which was a value in itself. As long as it fit in the RGR case, I thought it might be a great choice. Turns out, with a tiny bit of trimming, it fits perfectly! Read and watch for more info:
Hyperkin Specialist PCE/TG-16 Controller: https://amzn.to/3qk5XcT
Clear Replacement Shells: https://www.retrorgb.com/pc-engine-translucent-smoke-gray-case-by-retro-game-restore.html
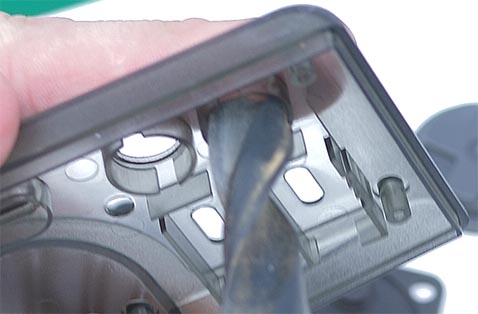
I disassembled the new Hyperkin controller and moved everything into the Retro Game Restore controller shell. As I tried to bolt down the new rear cover, I was having a hard time getting it closed and realized the buttons just wouldn’t fit all the way through. I’m not sure if the Hyperkin buttons were thicker, or if the RGR shell just had a tiny bit more plastic around the edges, but it seemed like such a small difference, that I could fix it.
At first, I hoped I had a drill bit I could hand-turn that was the perfect size, but all mine were either too small, or just a hair too big. I left that “test” in the video, cause it made me lol to see a giant drill bit next to that new shell 🙂
I ended up using an X-Acto knife to very carefully cut the extra “lip” around the button hole. The video made it look like one or two simple scrapes, but it took a minute: I tried to carefully cut all the extra material on the controller shell all the way up to the supporting plastic, without cutting any of the button shaft. Maybe the difference between the Hyperkin and RGR shells was just that tiny lip?:

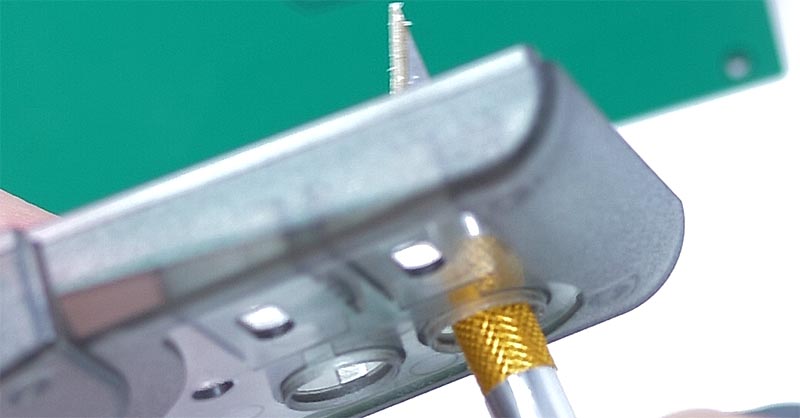
I then used the metal edges on the tightening nut of the X-Acto knife as a “file” and smoothed the edges. There weren’t any sharp burrs and it looked fine, but that last “smoothing” of the plastic removed any indication a mod was done at all:
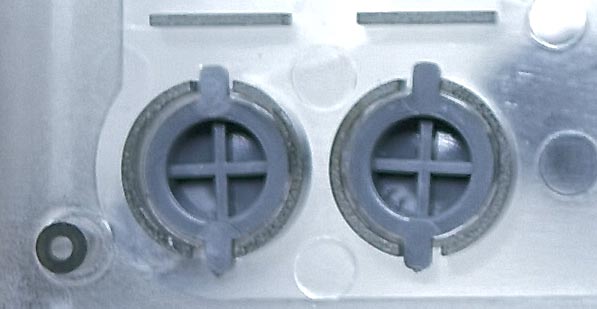
After that, the buttons fit perfectly! They weren’t “loose”, but they fit all the way to the end with no issues:
Then I affixed the overlay that Retro Game Restore ships with the kits: There’s a choice of two and only one has holes pre-cut for the “turbo” switches, so I had to choose that one. I honestly think the controller would have looked amazing without the overlay at all, but I wanted to complete the mod and see how it looked (click for full-sized):

Overall, I think it came out great! The Hyperkin controller is fine – It’s not quite as good as the original, but I didn’t have any major complaints about the one I got. I should note that Hyperkin isn’t known for their consistency though; Out of every 20 controllers, 19 might be perfect and one might have an issue. I’m comfortable recommending them, as generally speaking, if it comes from Hyperkin and doesn’t have an HDMI port, it’s usually a good value for the money. Run away from anything stamped “Hyperkin” that has an HDMI port on it though…
While I wouldn’t recommend running out and getting a Retro Game Restore kit just to do this, I’d absolutely recommend it for people in the same situation I was in: You bought a RGR kit, but want to leave your controller as-is. Spending another $25 (ish) to make use of the case would be worth it just for a PCE controller…but the fact that this Hyperkin kit also gives you a TG-16 – to PCE controller adapter that also works with original controllers makes this a really good purchase!
