
Last week I documented the method for adding a reverse polarity protection diode to the Atari Jaguar, to prevent damage caused by attaching the wrong power supply. ElectronAsh came up with the same mod for the Jaguar CD add-on, although it is a little more complex. Do not attempt this if you don’t own a multimeter, or if you are unsure of yourself. Any professional modder can perform this mod in less than five minutes, if they already have your Jag CD disassembled for other work like a recap or laser swap.
Once complete, your Jag CD is protected, but you should still always avoid connecting a center-positive PSU.
Parts Required:
1 Rectifier Diode – 1N5400 (protection up to 3A) – you can also use a higher voltage rated diode
Instructions:
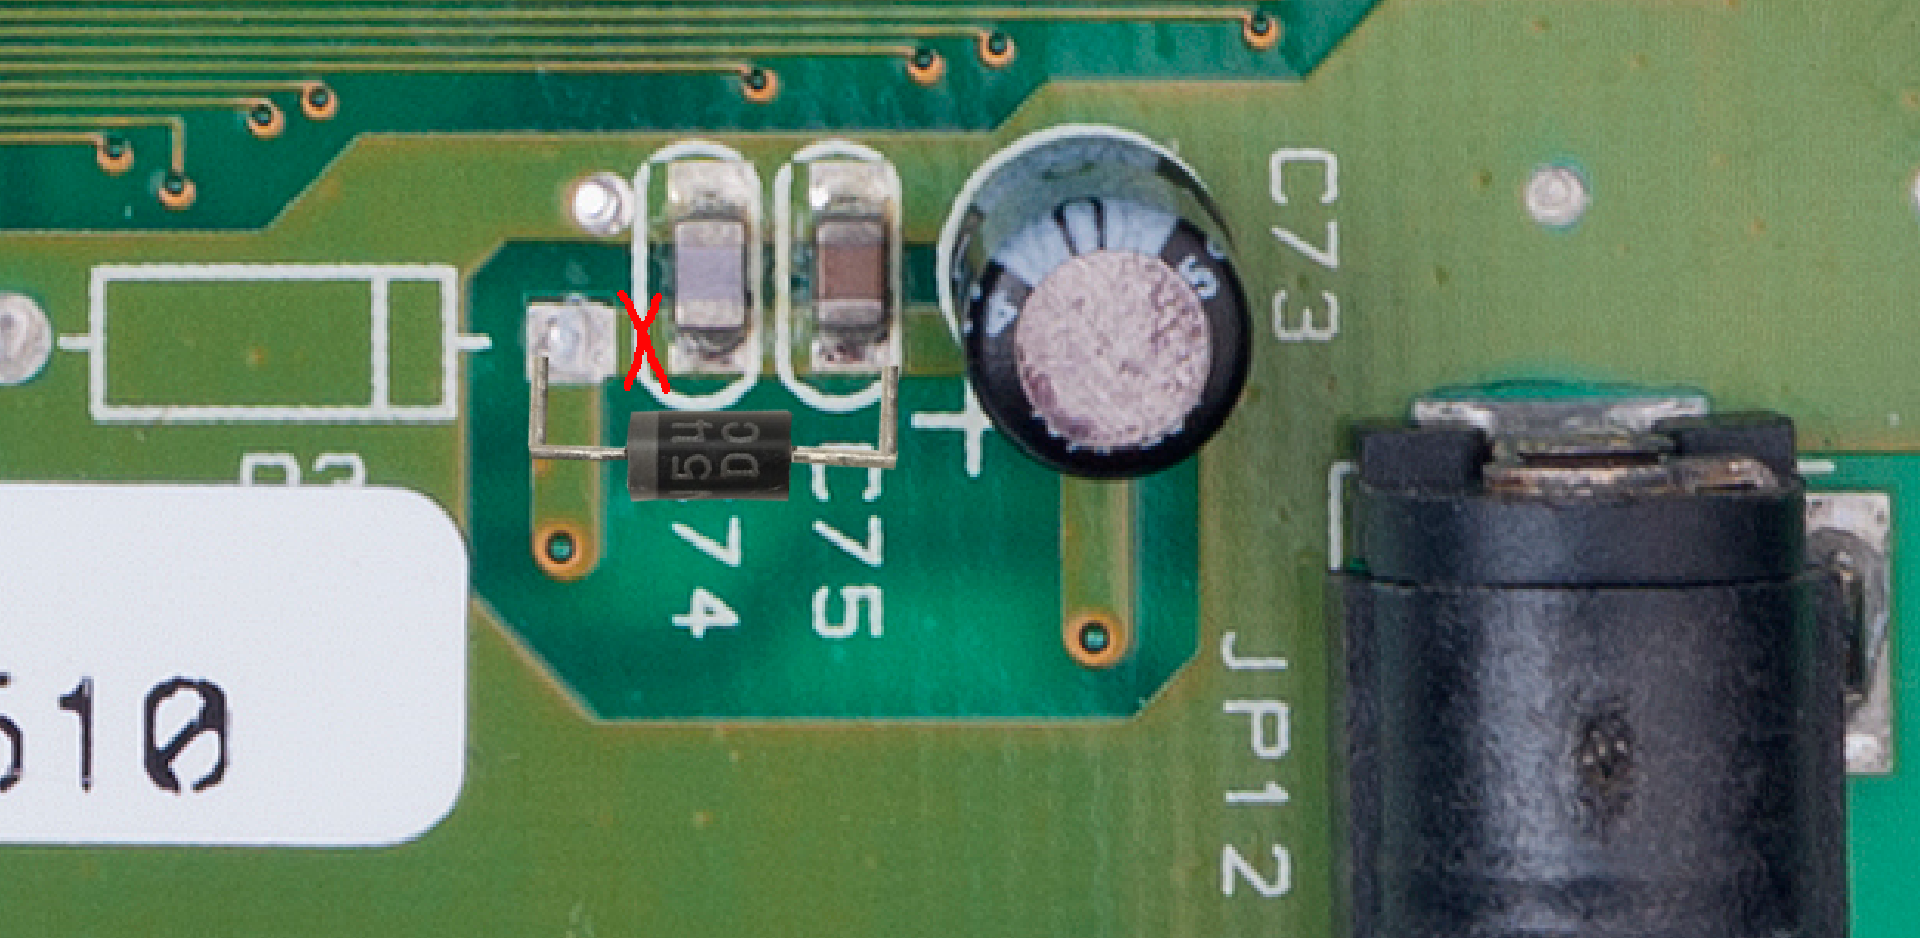
1. Locate C74 & C75 beside the Power Supply Jack. Use a razor to carefully cut the trace (denoted by a red X above) between C74 and the pad beside it.
As you can see, you don’t need to cut a big gash. Cut two clean, thin lines perpendicular to the trace to sever it.
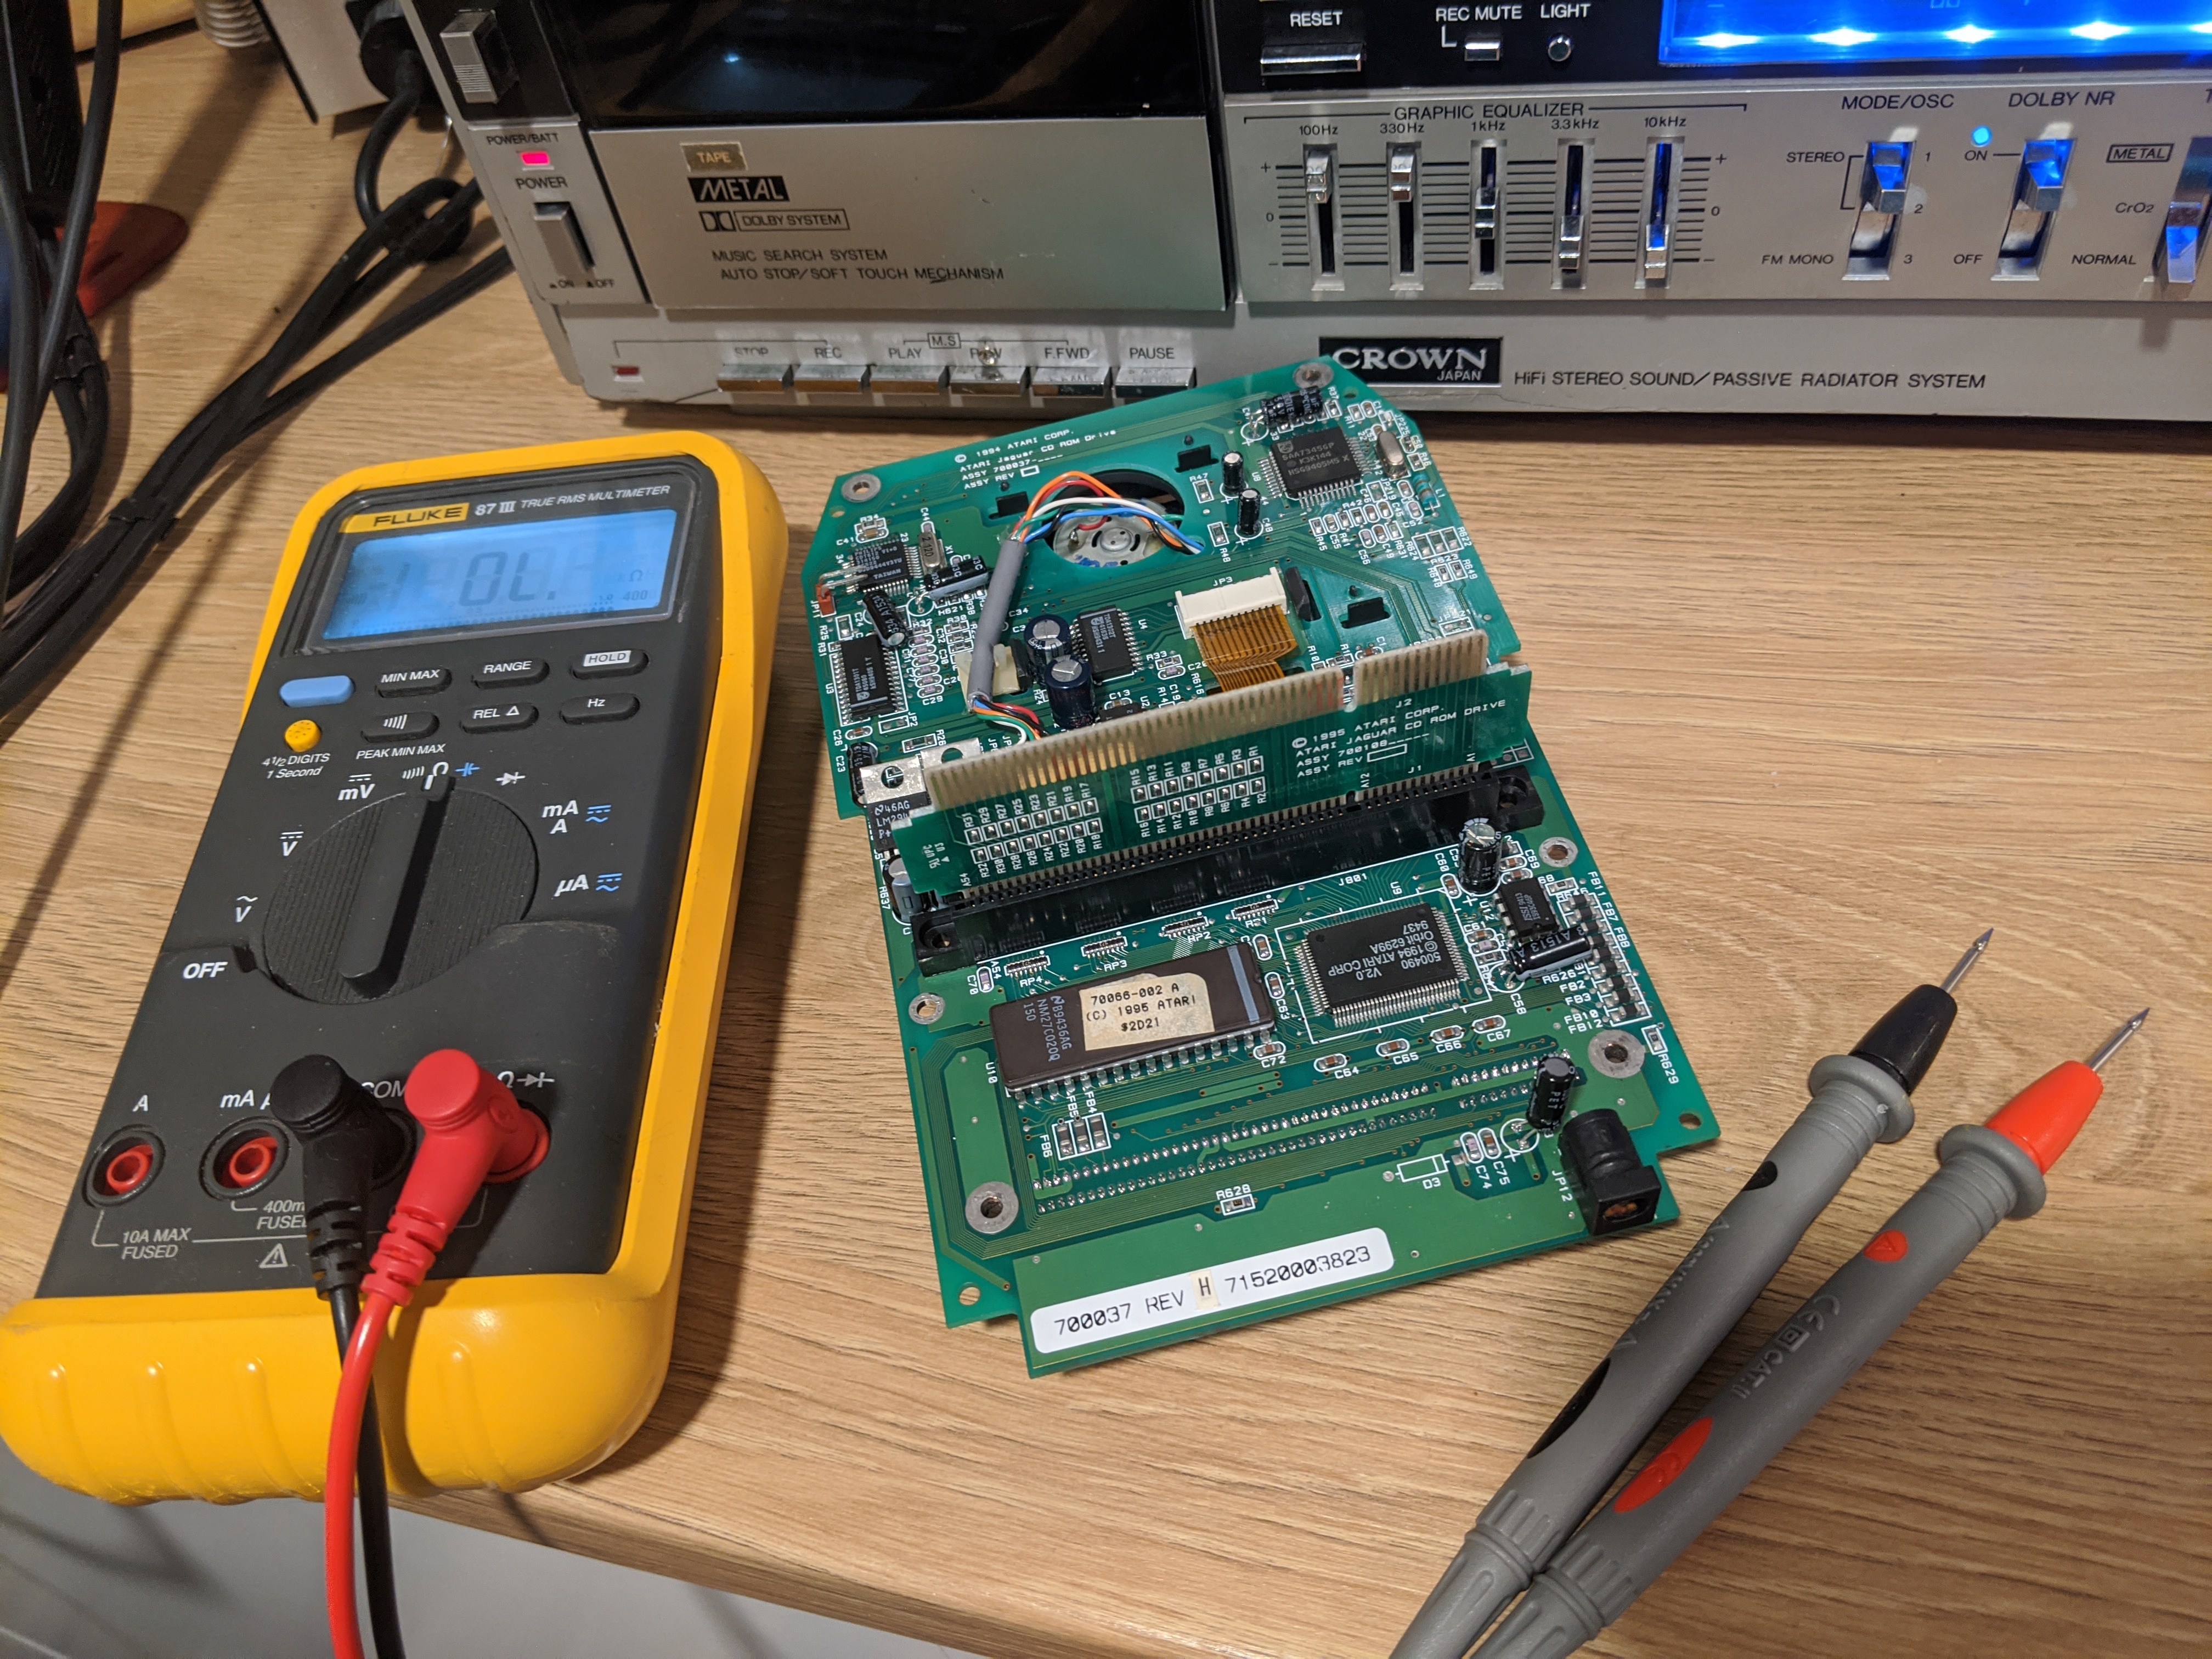
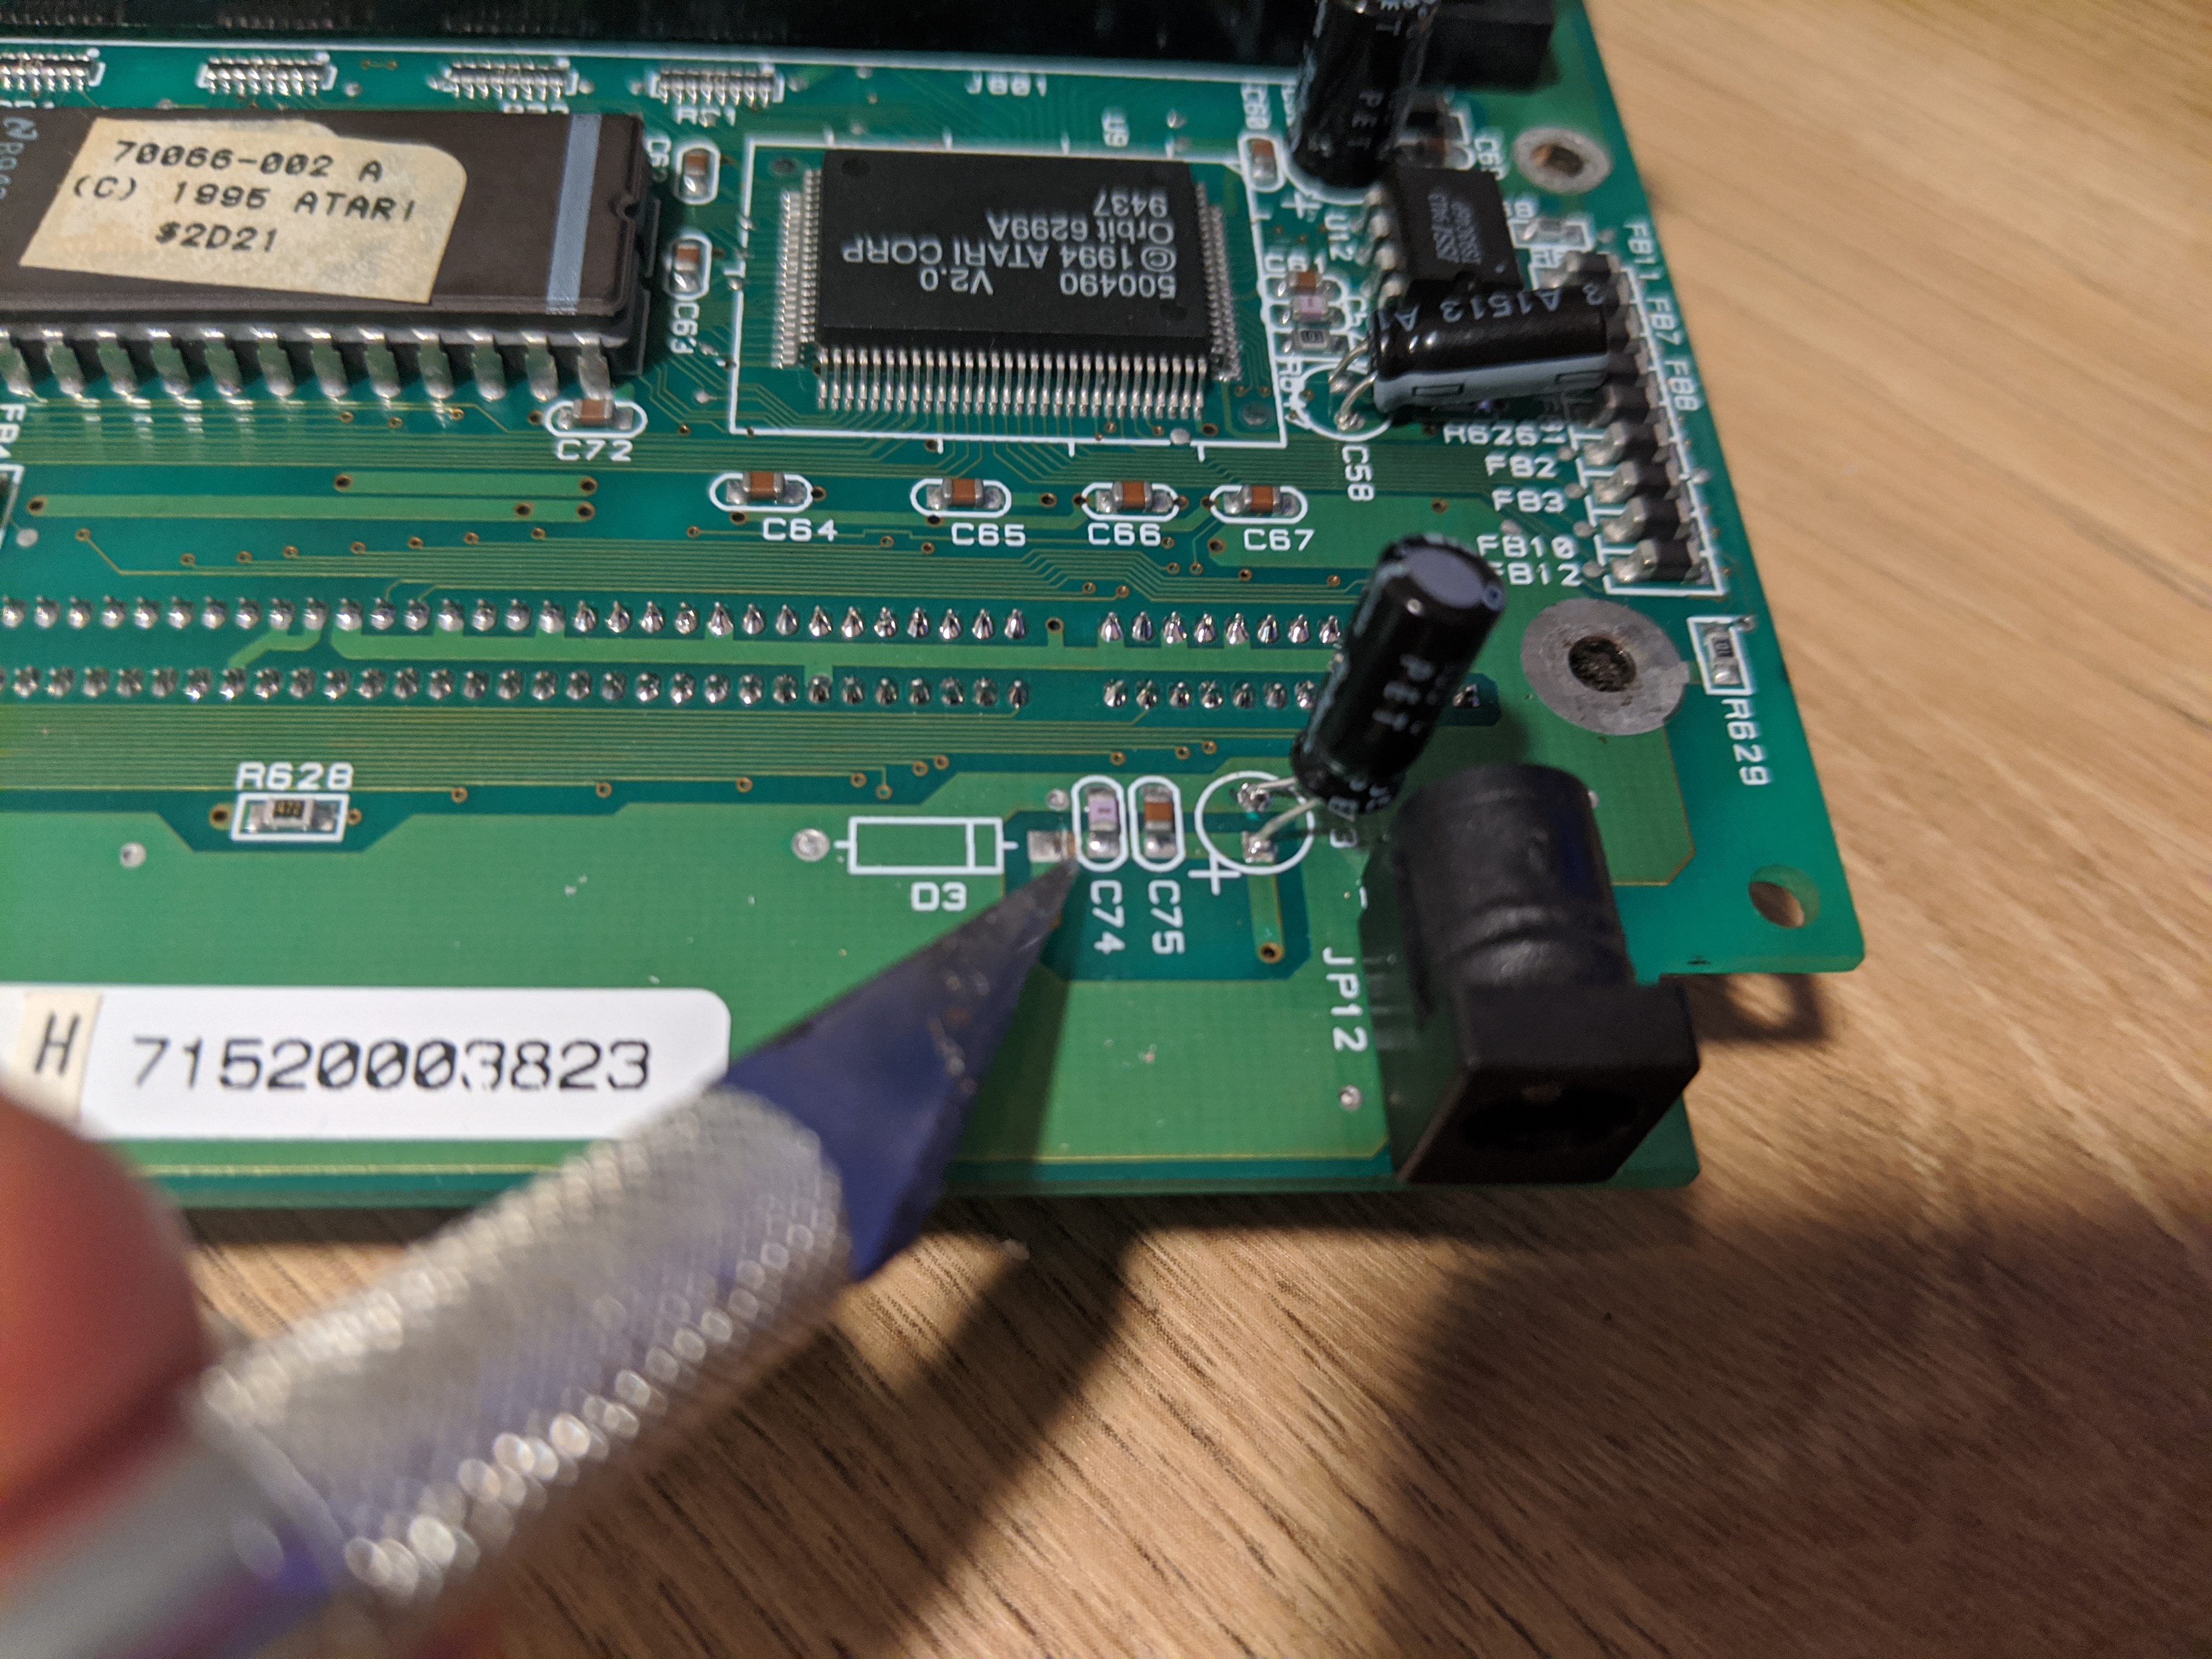
2. Use a multimeter to confirm there is no longer continuity between C74 and the pad.
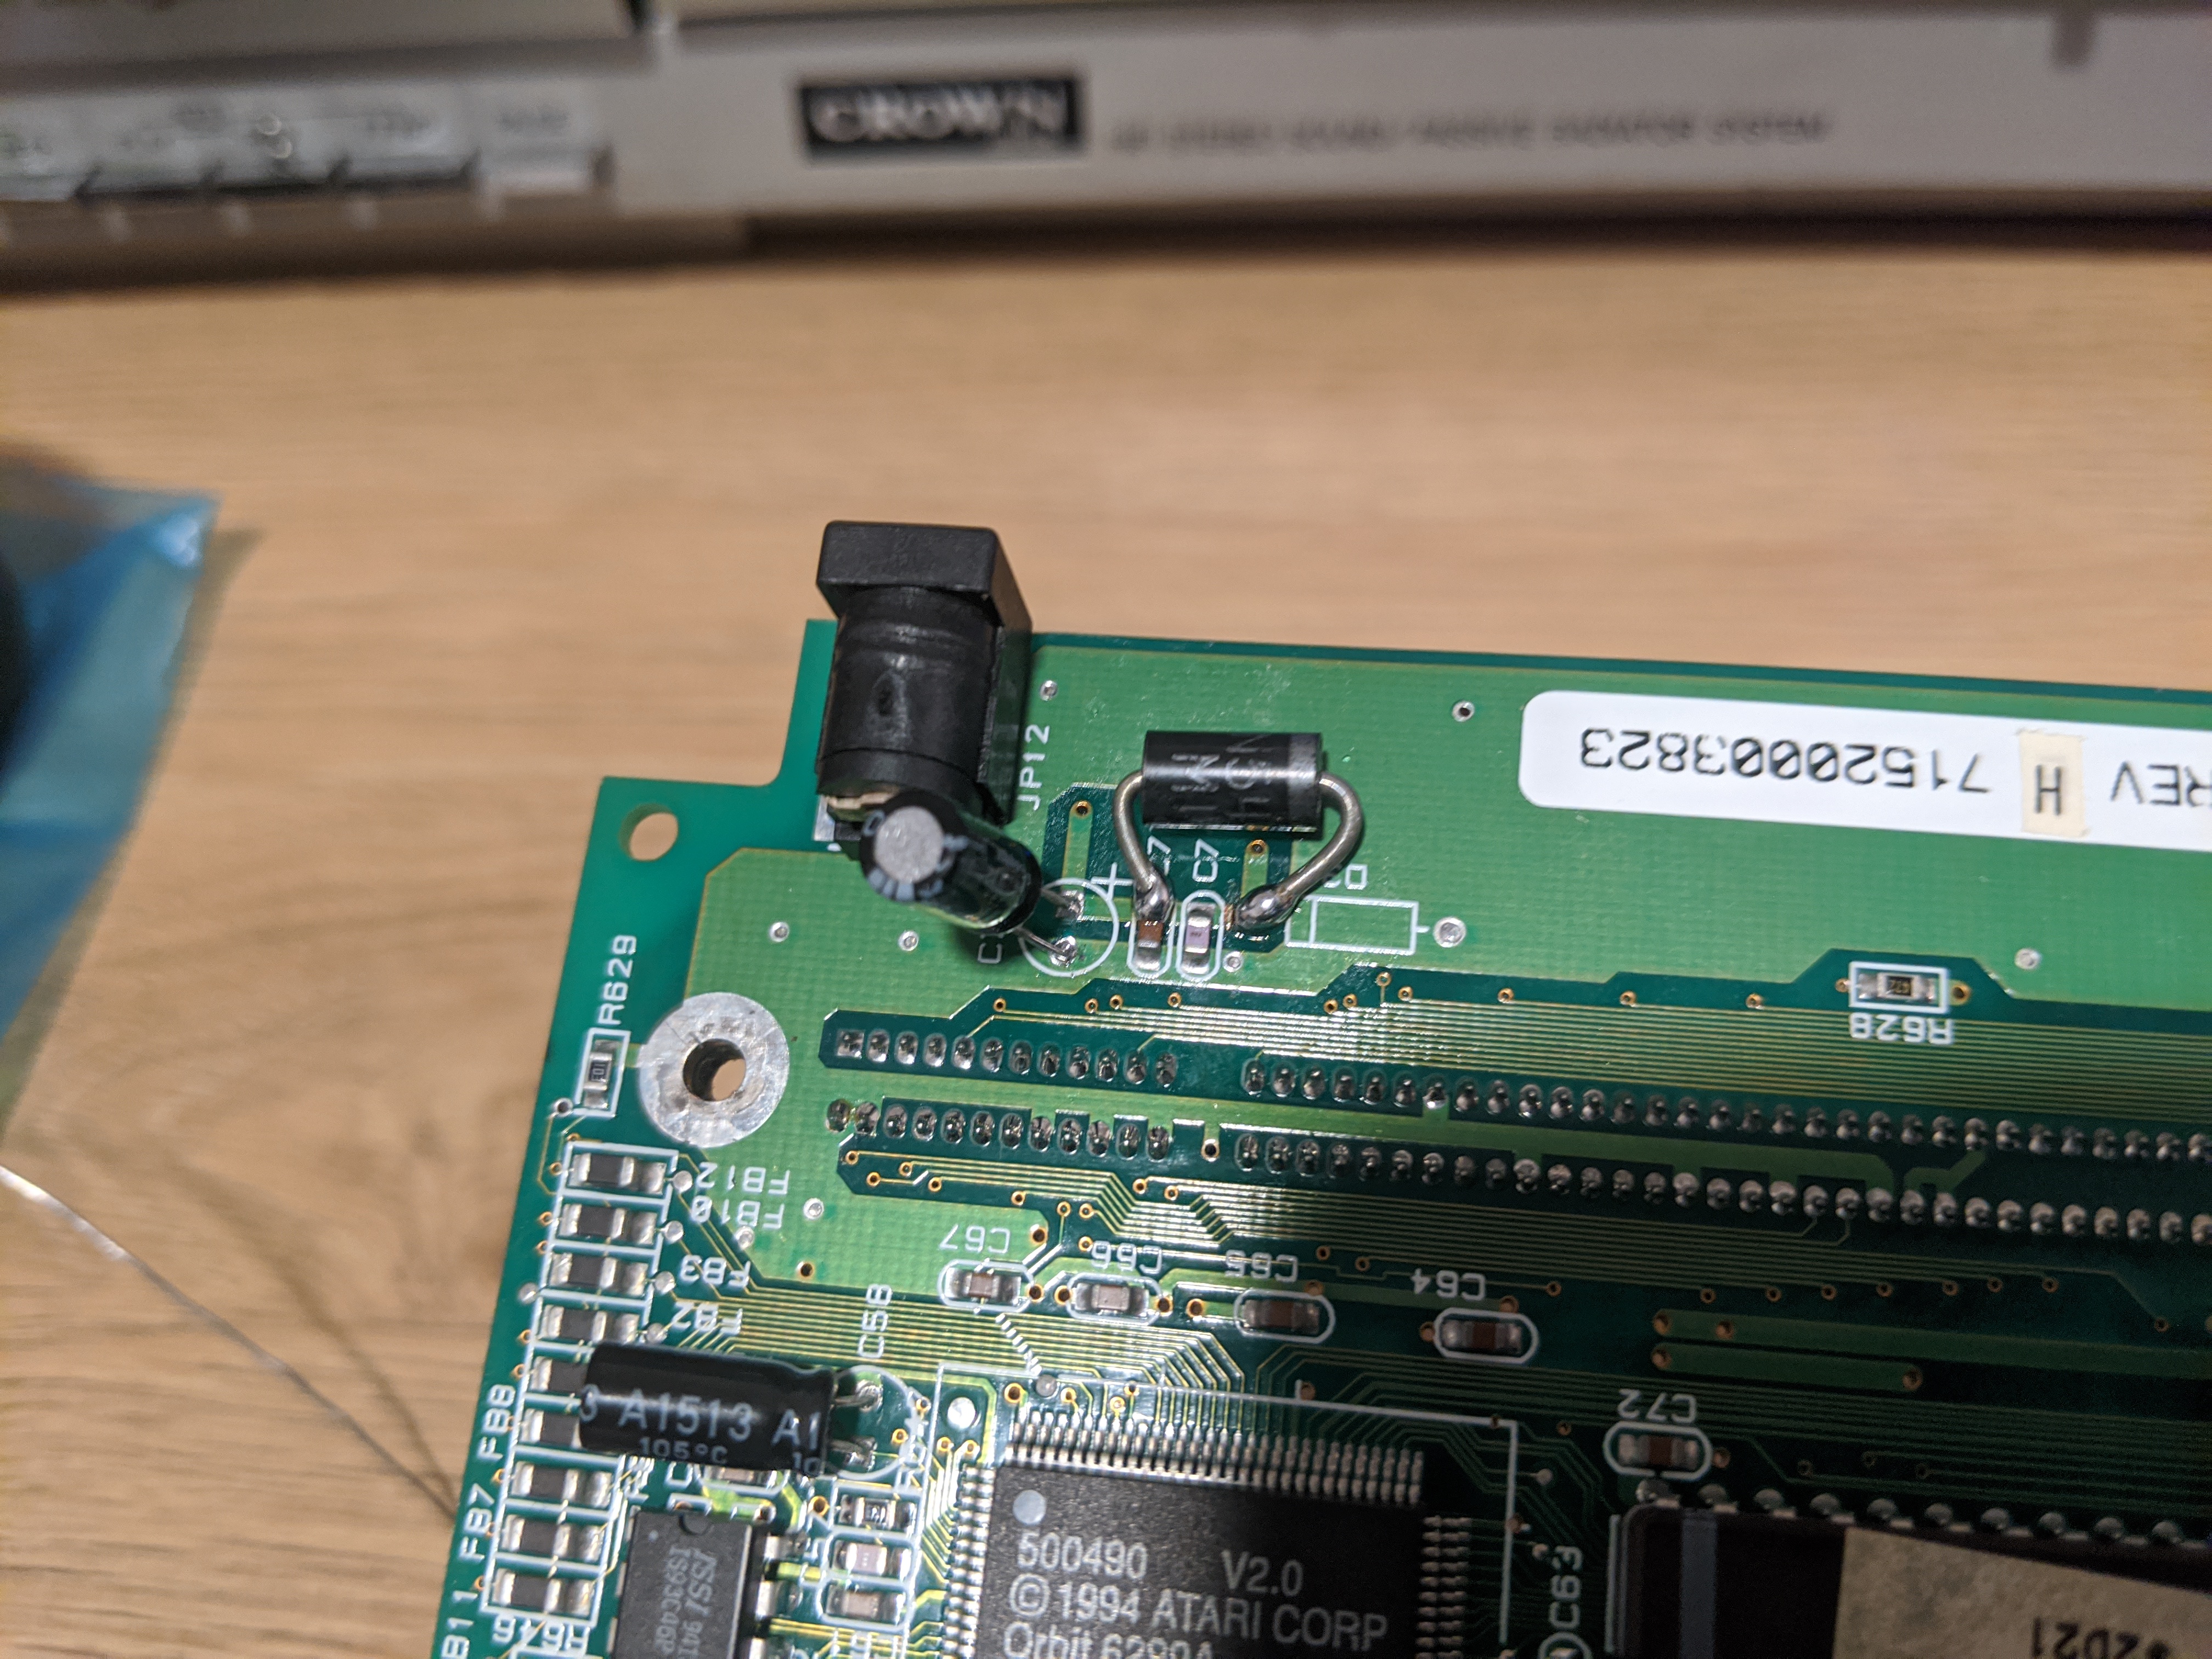
3. Solder the diode as shown above. The cathode side of the diode (denoted by a bar or line) attaches to the pad, and the opposite anode side is soldered to C75. Clean any flux left on the PCB from the work with isopropyl alcohol. You’re done.
Notes:
– Do not attempt this if you have any doubts, you could damage a very expensive console and this mod simply isn’t worth any risk whatsoever.
– If you solder the diode backwards, the console won’t power on.
– Do not attempt this modification without a complete and total understanding of what you are doing. RetroRGB is not responsible for any consequences.
Auto Amazon Links: No products found. http_request_failed: A valid URL was not provided. URL: https://ws-na.amazon-adsystem.com/widgets/q?SearchIndex=All&multipageStart=0&multipageCount=20&Operation=GetResults&Keywords=B07PBVF2HX|B07NFSFBXQ&InstanceId=0&TemplateId=MobileSearchResults&ServiceVersion=20070822&MarketPlace=US Cache: AAL_0eefc7da6593da377d2e8972d85c3a9e