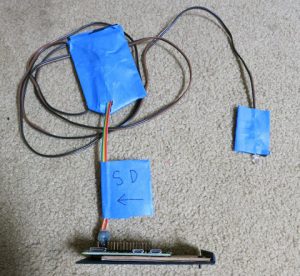
Awhile back, we reported on an open source project that allows people to use a Raspberry Pi and a high speed camera to measure lag on a display. The creator of that project then theorized about a dedicated device that would record measurements for you. The hope was that you can send a 4K signal to the panel using an RPi4 and measure if there’s any difference in lag between running a native 4K signal vs 1080p or lower. Unfortunately, due to the RPi4 drivers still being in poor shape (or completely non-existent), the device is currently not compatible with the 4, only all previous versions.
While still in a very DIY-looking form-factor, that device is now available to purchase, directly from the blog post (at the bottom): https://alantechreview.blogspot.com/2020/08/pilagtester-pro-order-page.html
While something like the Time Sleuth might be a better choice for most people just looking to test lag, this project might be more helpful for content creators, as produces graphs such as the one seen below that make great visual representations of the results, as opposed to just showing a blinking screen like I normally do 🙂

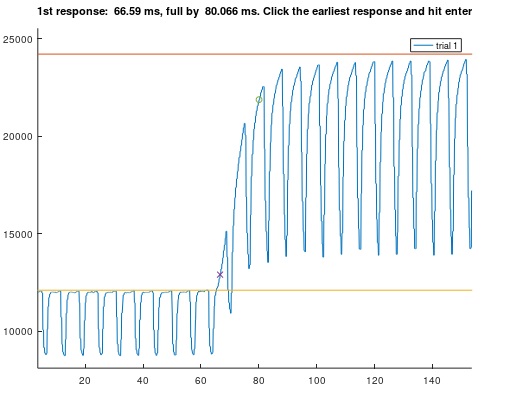
There’s also more information recorded and displayed during measurement, as shown in the top picture. Here’s a description of the information provided:
The white region of the graph depicts the monitor’s brightness before the rectangle is detected. This particular sample has a lot of backlight bleed, but you can also see some backlight flicker (the little notches).
Once the brightness rises 5% above black, the graph is painted red. The start of this region (also printed explicitly on the right in red) corresponds to the input lag of the monitor. A 5% change is roughly the threshold used by other lag testers, but is not that salient to your eyes. You might prefer to know when the monitor has mostly finished displaying the input (the 80% threshold), which is where the graph changes to yellow. I call this the full response, and it is printed in yellow at right. I consider it a more realistic measure of lag than the 5% threshold typically used, but it’s up to you! Subtracting the input lag from the full response gives the response time of the monitor (technically this is the b2w time, not the g2g usually published).
At the moment, it’s a bit of a rough kit though, requiring you to tape the light sensor to the panel and use a basic RPi/RPiZero to run it. I’ve ordered one in for testing and hopefully after I’m done with it, I can send it to LaserBear for Greg to design a 3D Printed case that will make this feel like more of a polished, “consumer” product.

So, while this device is “finished”, I’d think of the project itself as a “work in progress”. I’ll follow up with a post or video after I receive mine.

