For ages, region specific imports have been in existence; however, I’ve never bothered with obtaining them because of the language barrier. Thanks to the super stacker that’s no longer an issue.
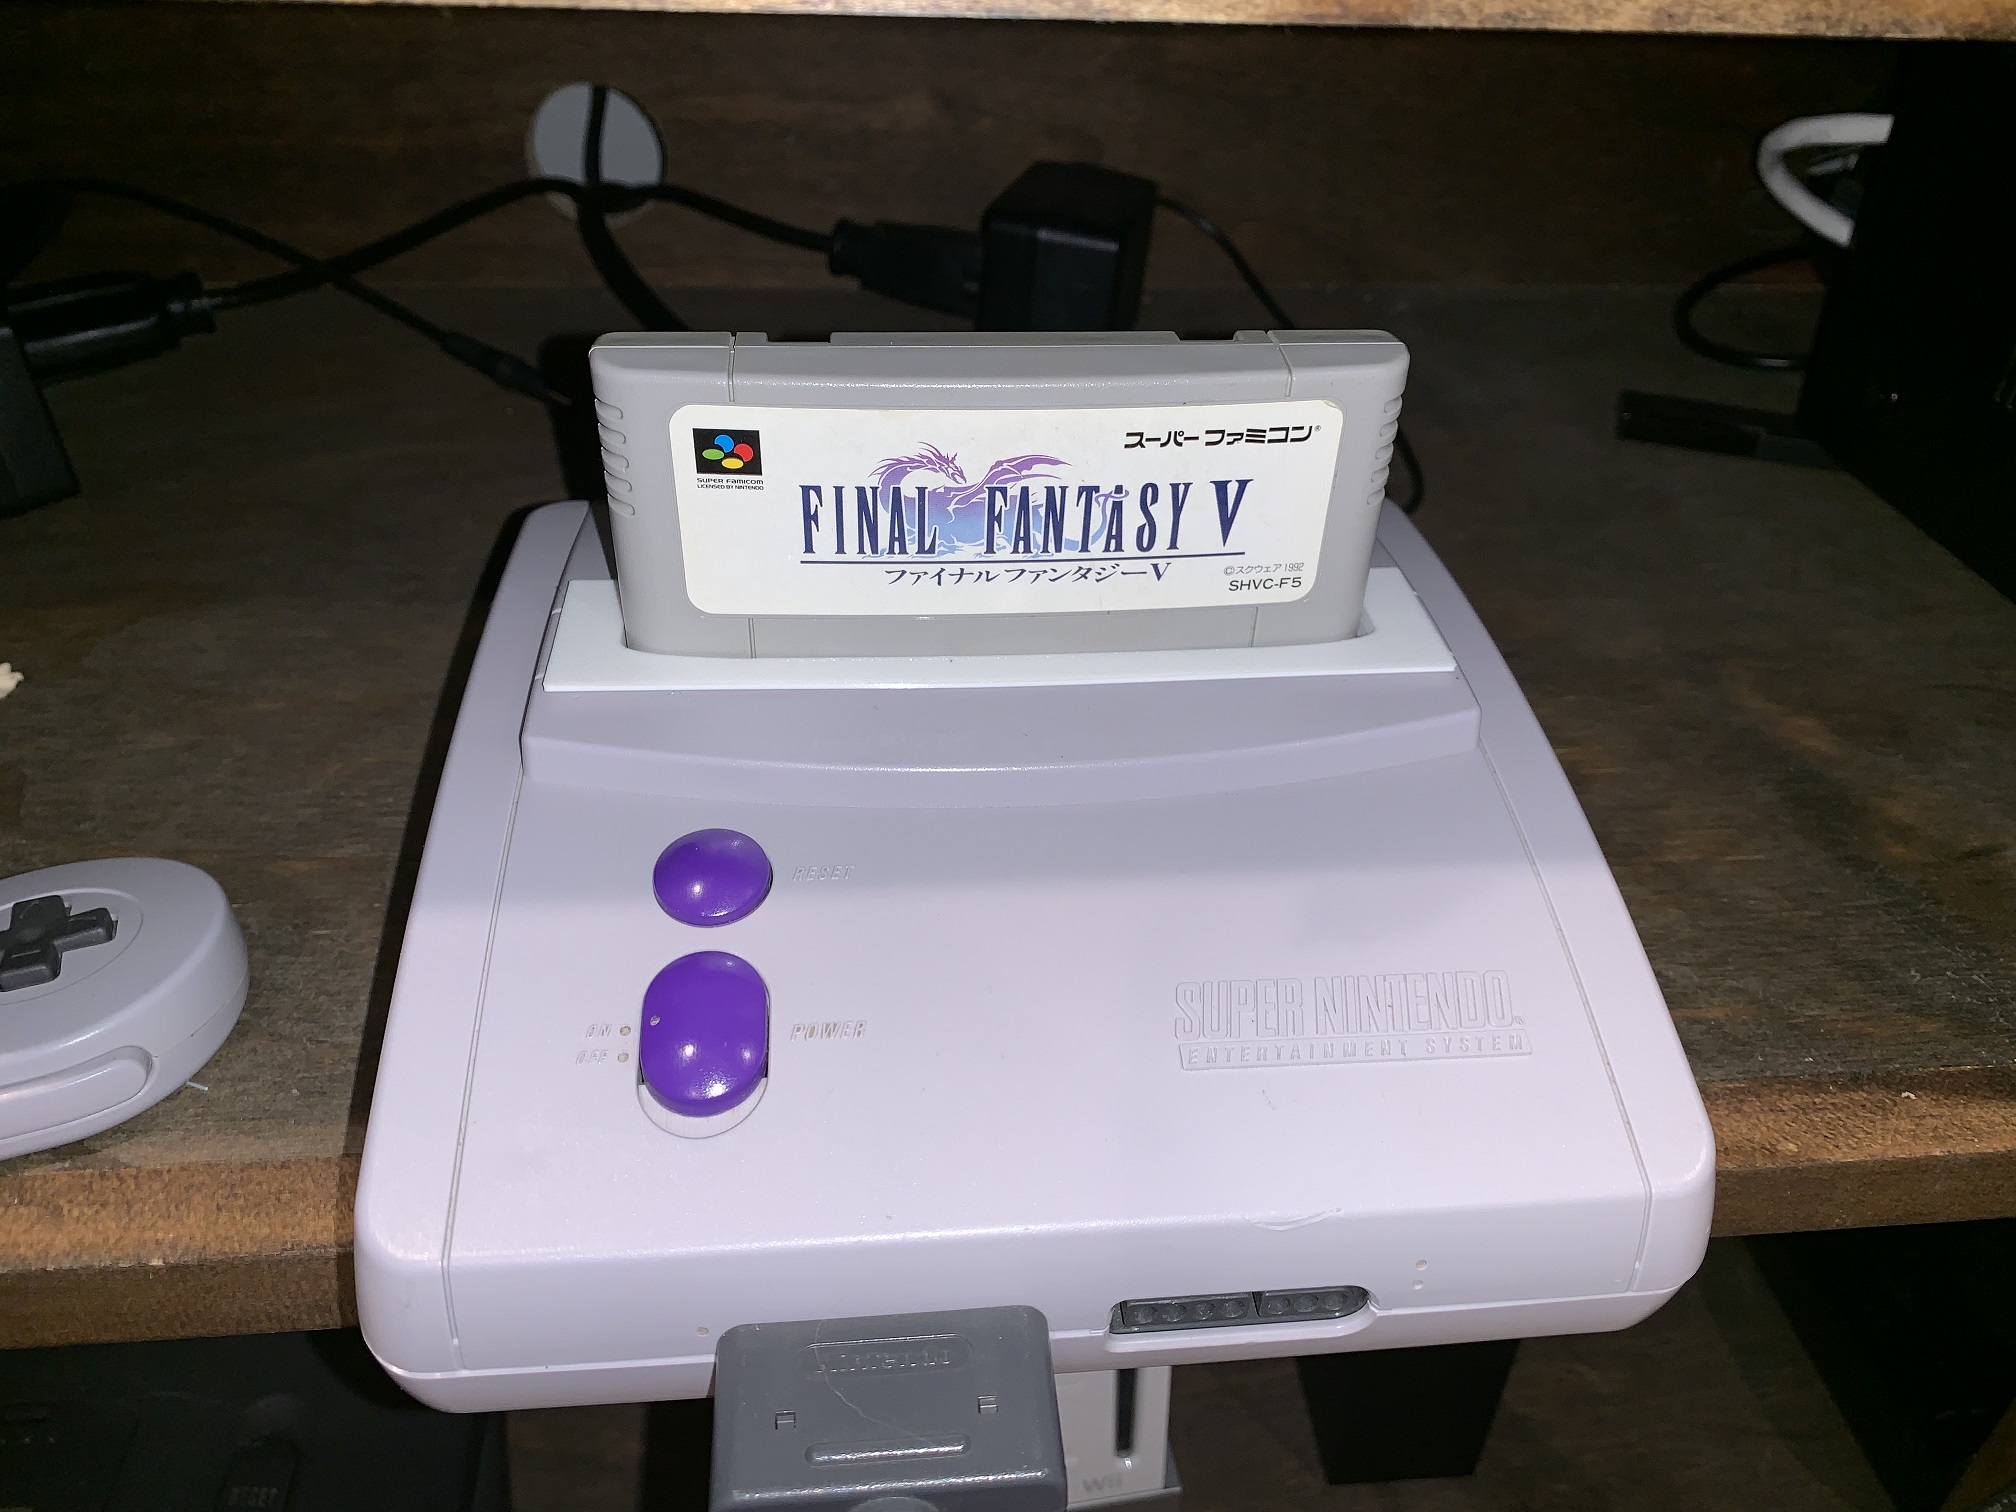
Problem solved, right? Nope, this brings up another issue — dealing with the cartridge slot. The cartridge slot for the Super Famicom and the Super Nintendo vary in that the cartridges for the Super Nintendo have an indention that connects with the inside of the case when inserting the game. Super Famicom Games are flat and do not have this, meaning you can not natively run Super Famicom games on a Super Nintendo, even though the device is region free.

There are multiple ways to deal with this and while most people elect to file down the plastic that sticks out, I went with removing the base all together. This can easily be done with a screwdriver, and unscrewing the three screws that hold the base together.


I did this because I didn’t want to cause permanent damage to the case, there might be a day I purchase a Super Famicom and want to reconnect the base or sell the device (highly unlikely).
Problem solved, right? Not quite. In my experience, if the Super Famicom game was not placed in the cartridge slot perfectly, the game would not start. For US games, this was never an issue because the cartridge had something to connect to on the inside. This is harder than it sounds due to the sensitive of the carts and the Super Famicom case contours to the cartridge. Even then, if the game started and somehow the cartridge slightly moved, the game would freeze. Instead of fighting with cartridge placement and hoping it never moves during gameplay, I came up with an insert for the cartridge slot to place the games perfectly in the slot every time.
The walls of the insert are only 0.82mm thick, this was about the only workable thickness as the constraints of the cartridge slot and the size of the cartridge didn’t leave much room for variations. If I went thicker, the game wouldn’t fit and if I went thinner, the printer wouldn’t create a sturdy frame and the game wouldn’t be as secure. On the left and right of the insert is a slight curve. The cartridge will fit inside insert very snug. Without human interaction, it’s not going to move. You can even lift it during gameplay and the game will continue, but I don’t suggest doing so.
You will need to remove the insert to play US Region games as they molds are different.

I’ve also created a “Super Famicom” and “Nintendo” dust cover. I attempted a “Super Nintendo” logo dust cover but the bottom text needed to be larger to make a proper print. That way people who don’t want to leave a game in the console when not being used can not have to worry about dust going inside the case.


Print Settings using Prusa mk3:
- Filament: PLA (Hatchbox White was used)
- Layer Height: 0.20mm (first layer) and 0.15mm remainder
- Infill: 15%
- Infill Design: Gyroid
- Top Fill Pattern: Rectilinear
- Rotated: 180 degrees on X axis (to eliminate needing supports)
- Supports: Not Needed
- Hardened Steel Nozzle: 225 (first layer) and 220 remainder
- Bed Temperature: 60 throughout
- Print Time: 6 hours 53 minutes (for the 3 piece bundle)
Enabled:
- Extra parameters if needed
- Avoid crossing perimeters
- Detect Thin Walls
I am releasing the STL and GCODE (do not use and reslice if you have a different model 3d printer) for free for anyone to print here. If you do not have a printer and would like one, I am offering them for sale here (USA, Canada and Mexico shipping only).